
簡介
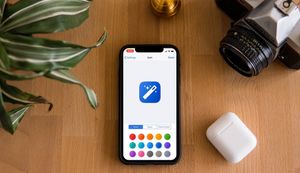
在本篇教學中,我將會分享如何創造一個在許多 App 中常見的圖示創建系統。我相當喜歡 Apple 的捷徑 (Shortcuts) App,所以一直都很想瞭解他們是如何創造這些東西,讓使用者可以為一個列表客製化圖示,而不是單純地選取一個已經完成的圖示。
當然,我已經先上網找了許多文章,但都沒有獲得任何相關資訊。所以,我決定自己動手做!
本篇文章將會依照下列流程進行:
- 起始專案
- 介紹我的方法
- 加入名為 CoreDataCreating 的一個 CoreData 管理器模型
- 依靠 CoreData 模型
- 實作 CreateListController
- 實作 ListIconController
- 更新 Main ViewController
- 最終成果與結論
- 參考資料
起始專案
先前我試過創建類似 Apple 捷徑 App 的客製化 CollectionView,你可以在這裡閱讀那篇文章。
下載 GitHub 上的專案,讓我們立即開始吧!
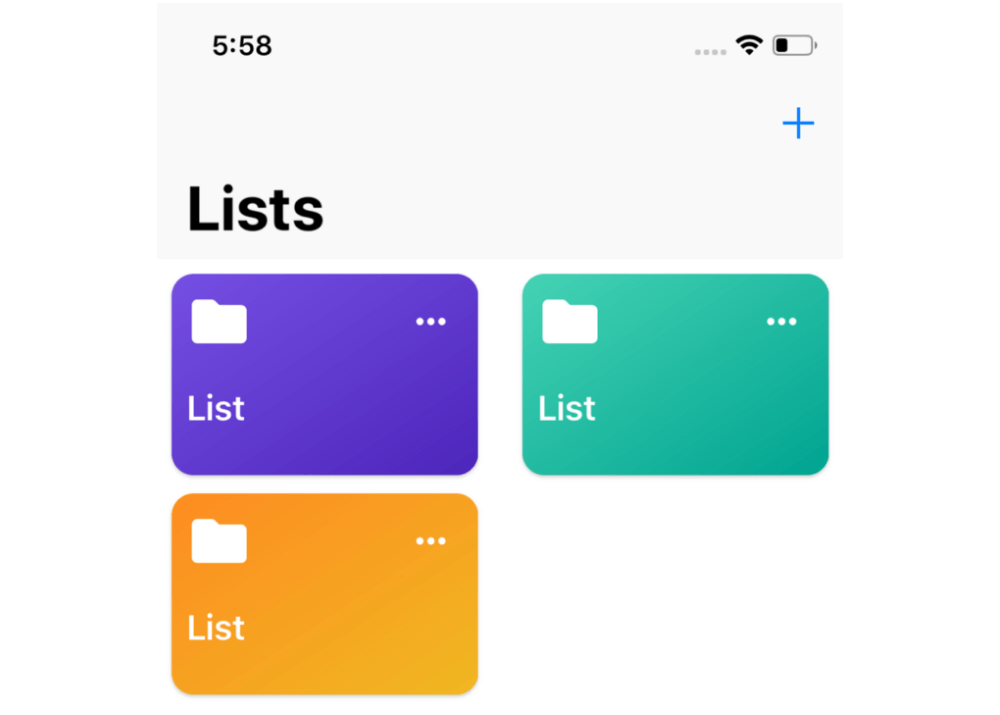
在 Xcode 執行專案,然後會看到類似下面的起始畫面。
我的方法
為了實現我想要的功能,我主要依靠 Notification Pattern 來傳遞所選的圖示和顏色。
透過傳遞圖示和背景顏色,我將來自該訊息的視圖連接起來,然後將 UIView 渲染為 UIImage。
同時我還使用了 CoreData 來儲存有關列表的所有資訊。
CoreData
我曾經學習過 CoreData 的用法,所以我選擇使用它來作為 App 的資料庫,它真的很容易就能夠加入到現有的專案之中。
現在從 File 選取 New File,或是使用鍵盤的快捷鍵 ⌘+N,接著在 Core Data 的頁籤之下選取 Data Model,將它取名為 Model 並點擊 Create。
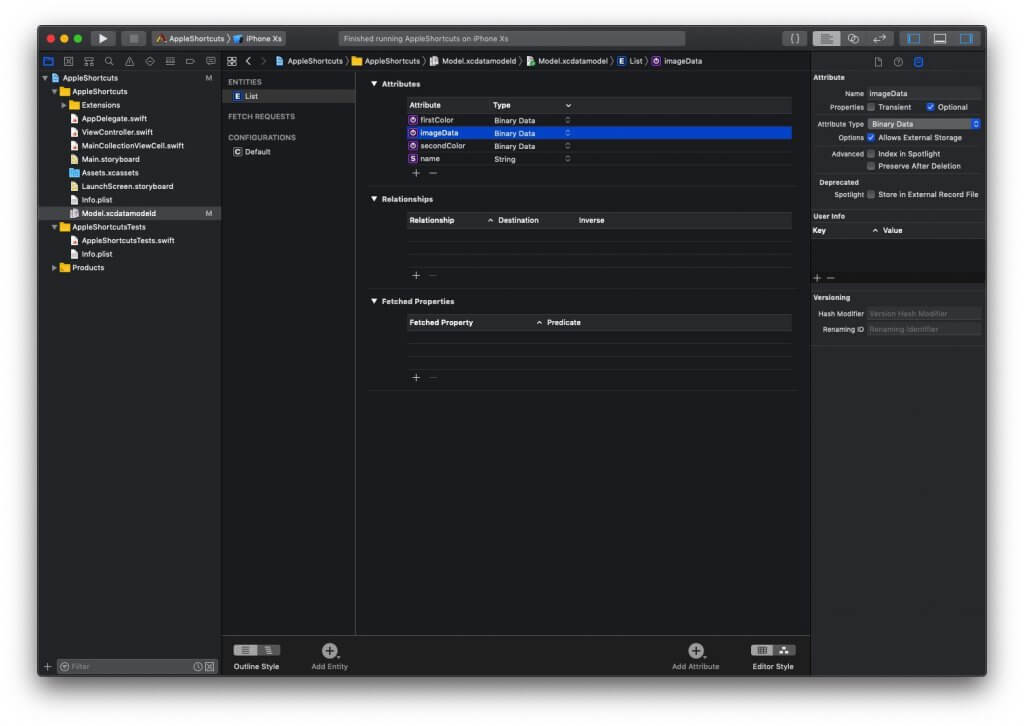
加入新的 Entity,讓我們把它命名為 List,然後加入下列這些屬性:
- 類型為 String 的
name - 類型為 Binary Data 的
firstColor - 類型為 Binary Data 的
secondColor - 類型為 Binary Data 的
imageData,並在屬性檢視器中將 Allows External Storage 選項打勾。
CoreData Manager
為了讓事情更加簡單,我將會建立一個 CoreDataManager 結構,讓我們更容易處理 CoreData。
從 File 中選擇 New File,或是使用鍵盤快捷鍵 ⌘+N,並選擇 Swift File,將它取名為 CoreDataManager,並點擊 Create。
struct CoreDataManager {
  static let shared = CoreDataManager()

  let persistentContainer: NSPersistentContainer = {
    let perCon = NSPersistentContainer(name: "Model")
    perCon.loadPersistentStores { (storeDescription, err) in
      if let err = err {
        fatalError("\(err)")
      }
    }
    return perCon
  }()

  func fetchLists() -> [List] {
    let context = persistentContainer.viewContext
    let fetchRequest = NSFetchRequest<List>(entityName: "List")
    do {
      let lists = try context.fetch(fetchRequest)
      return lists
    } catch let err {
      print("\(err)")
      return []
    }
  }
}
藉由這個模型的幫助,我可以獲得 CoreData 的 context,以及所有列表。
依靠 CoreData
我們需要做出一些更動,才能完全地依靠 CoreData。現在切換到 ViewController.swift 並加入一個新的屬性 (Property):
var lists = [List]()在 collectionView:numberOfItemsInSection: 方法之中,將回傳值由 3 變更為 lists.count。
接著,切換到 MainCollectionViewCell.swift,並加入列表 Property,將漸層方法移除,讓設置方法符合下列形式:
  // MARK: Setup Cell
  fileprivate func setupCell() {
    setCellShadow()
    self.addSubview(iconImageView)
    self.addSubview(listNameLabel)
    self.addSubview(editButton)
    iconImageView.anchor(top: safeTopAnchor, left: safeLeftAnchor, bottom: nil, right: nil, paddingTop: 8, paddingLeft: 8, paddingBottom: 0, paddingRight: 0, width: 36, height: 36)
    listNameLabel.anchor(top: iconImageView.bottomAnchor, left: safeLeftAnchor, bottom: nil, right: nil, paddingTop: 18, paddingLeft: 8, paddingBottom: 0, paddingRight: 0)
    editButton.anchor(top: safeTopAnchor, left: nil, bottom: nil, right: safeRightAnchor, paddingTop: 8, paddingLeft: 0, paddingBottom: 0, paddingRight: 8, width: 36, height: 36)
  }
 }
回到 ViewController.swift,並在 collectionView:cellForItemAt: 方法之中更新它,只需要傳遞列表即可。
  override func collectionView(_ collectionView: UICollectionView, cellForItemAt indexPath: IndexPath) -> UICollectionViewCell {
    let cell = collectionView.dequeueReusableCell(withReuseIdentifier: cellId, for: indexPath) as! MainCollectionViewCell
    let list = lists[indexPath.row]
    cell.listNameLabel.text = list.name
    cell.setGradientBackgroundColor(colorOne: UIColor.color(data: list.firstColor!)!, colorTow: UIColor.color(data: list.secondColor!)!)
    cell.editButton.addTarget(self, action: #selector(editCellButton), for: .touchUpInside)
    cell.makeRoundedCorners(by: 16)
    if let image = list.imageData {
      cell.iconImageView.image = UIImage(data: image)
    }
    return cell
  }
現在經過定義列表的資料來源之後,讓我們開始來實際創建一個新的列表。
創建列表
我們將會創造一個新的 Storyboard,所以來再次從 File 選擇 New File,或是使用鍵盤快捷鍵 ⌘+N,接著選擇 Storyboard,將它命名為 CreateList,並點擊 Create。
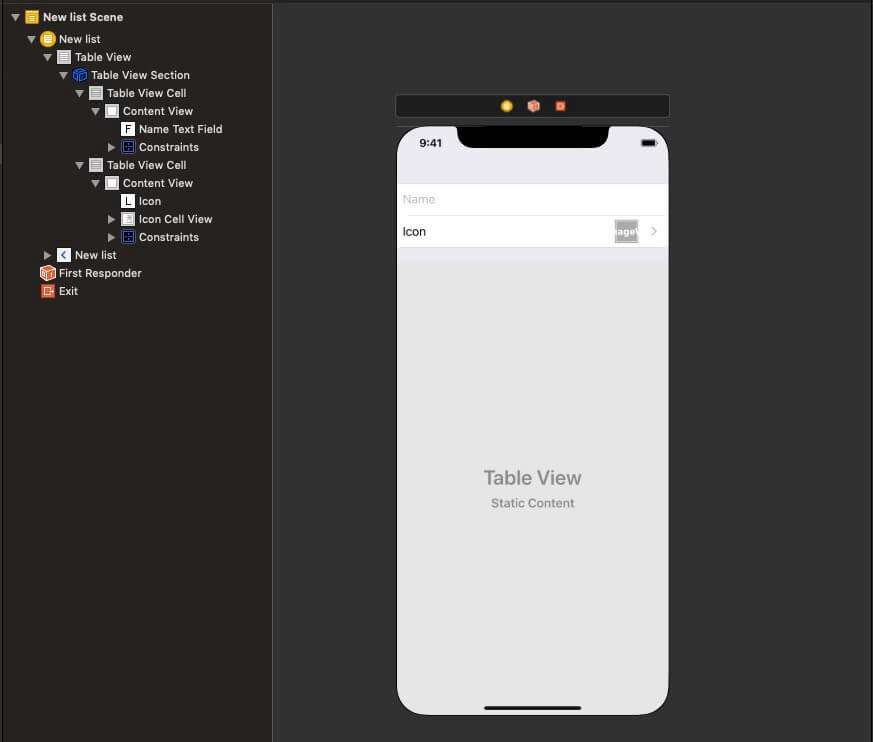
添加一個包含下列屬性靜態單元格的 TableViewController,並進行分組,將第一而唯一的部分分為兩行。在第一行加入 TextField,並第二行加入 Label 與 ImageView,並將 accessory 改為 Disclosure Indicator.
添加 NavigationItem、LeftBarButton、以及 RightBarButton.
創建一個名為 CreateListController 的 Swift File,並讓它繼承 UITableViewController。再次回到 storyboard,並設定客製化類別與 Storyboard ID 到 CreateListController。
為了測試的用途,切換到 ViewController.swift,在 addNewList 方法之中推送我們新的控制器,你將會看到控制器已經被推送,不過可想而知,目前還不能夠正常運作。
現在創建一個名為 CreateListControllerDelegate 的 protocol。
protocol CreateListControllerDelegate: class {
  func didAddList(list: List)
}
現在為按鈕列項目、文字欄、和圖示影像視圖創建出口 (outlet),並為兩個按鈕列項目創建動作 (action),並創建委派屬性。
class CreateListController: UITableViewController {

  @IBOutlet weak var doneBarButton: UIBarButtonItem!
  @IBOutlet weak var nameTextField: UITextField!
  lazy var iconImage: UIImageView = {
    let imgView = UIImageView()
    return imgView
  }()
  @IBOutlet weak var iconCellView: UIImageView!

  weak var delegate: CreateListControllerDelegate?
  // ..
  // ..

  override func viewDidLoad() {
    super.viewDidLoad()
    //..
  }

  override func viewWillAppear(_ animated: Bool) {
    super.viewWillAppear(animated)
    //..
  }

  @IBAction func handleSave(_ sender: Any) {
    // Create List
  }

  @IBAction func handleCancel(_ sender: Any) {
    // Dismiss
  }
}
將 addNewList 方法之中的委派連結到 ViewController.swift 檔案之中。
  @objc func addNewList() {
    let storyboard = UIStoryboard(name: "CreateList", bundle: nil)
    guard let createListController = storyboard.instantiateViewController(withIdentifier: "CreateListController") as? CreateListController else { return }
    createListController.delegate = self // delegate connected
    let vc = UINavigationController(rootViewController: createListController)
    present(vc, animated: true, completion: nil)
  }
接著來處理空字串的情況,如果文字欄中是空的,那麼完成按鈕應該變更為不能點擊的狀態。
class CreateListController: UITableViewController {
    @IBOutlet weak var doneBarButton: UIBarButtonItem!
    @IBOutlet weak var nameTextField: UITextField!
    // ..
    // ..
    var chooseIconTapped = false

    override func viewDidLoad() {
      super.viewDidLoad()
      handleEmptyFields()
    }

    override func viewWillAppear(_ animated: Bool) {
      super.viewWillAppear(animated)
      checkFields()
    }

    func handleEmptyFields() {
      doneBarButton.isEnabled = false
      nameTextField.delegate = self
    }

    func checkFields() {
      if list != nil || chooseIconTapped && nameTextField.text!.count > 0 {
        doneBarButton.isEnabled = true
      }
    }
}

extension CreateListController: UITextFieldDelegate {
  func textField(_ textField: UITextField, shouldChangeCharactersIn range: NSRange, replacementString string: String) -> Bool {
    let text = (nameTextField.text! as NSString).replacingCharacters(in: range, with: string)
    if text.isEmpty || !chooseIconTapped {
      doneBarButton.isEnabled = false
    } else {
      doneBarButton.isEnabled = true
    }
    return true
  }
}
然後,儲存所有創造一個新列表需要的變更在 CoreData 中。
  private func createList() {
    let context = CoreDataManager.shared.persistentContainer.viewContext
    let list = NSEntityDescription.insertNewObject(forEntityName: "List", into: context)
    list.setValue(nameTextField.text, forKey: "name")
    if let firstColor = firstColorData {
      list.setValue(firstColor, forKey: "firstColor")
    }
    if let secondColor = secondColorData {
      list.setValue(secondColor, forKey: "secondColor")
    }
    if let image = iconImage.image {
      let imageData = image.jpegData(compressionQuality: 0.8)
      list.setValue(imageData, forKey: "imageData")
      iconCellView.image = UIImage(data: imageData!)
    }
    do {
      try context.save()
      dismiss(animated: true) {
        self.delegate?.didAddList(list: list as! List)
      }
    } catch {
      let nserror = error as NSError
      fatalError("Unresolved error \(nserror), \(nserror.userInfo)")
    }
  }
創造圖示控制器
原本捷徑 App 中的圖示創造畫面應該長得像這樣:
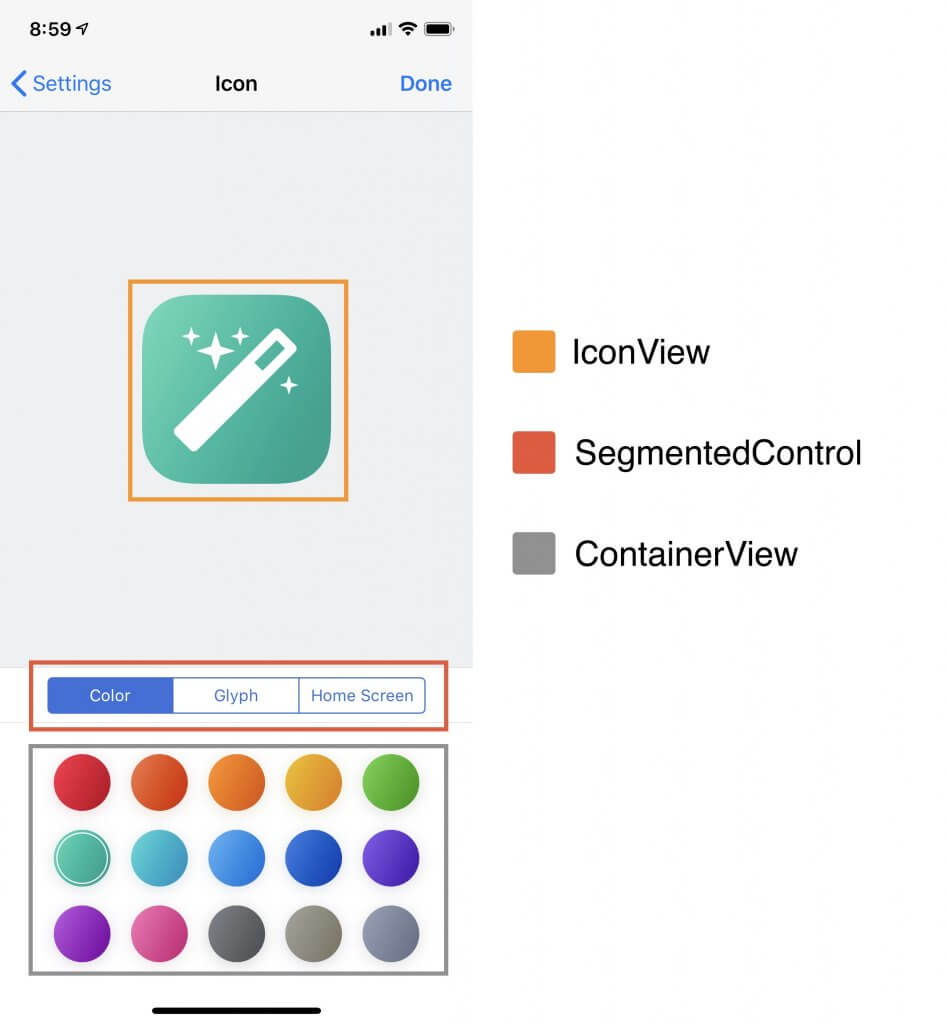
- IconView:你會在這個視圖中建構圖示,並看到你的成果。
- SegmentedControl (分段控制):你將會使用分段控制來切換容器視圖裡面的視圖。
- ContainerView:在這視圖當中,你將會選擇你想要的顏色、字型及圖片。
因此,我在 CreateList.storyboard 之中創建了一個相似的螢幕。
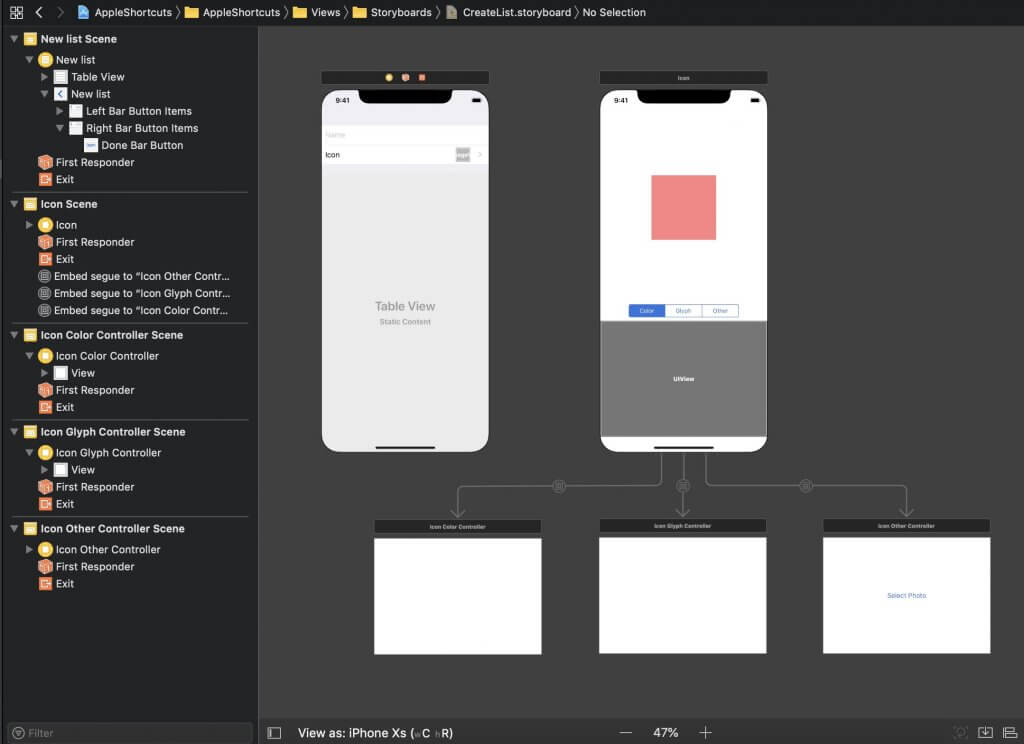
創建四個新的 Swift 檔案,並命名為 ListIconController、 IconColorController、IconGlyphController 及 IconOtherController。
在 IconOtherController 之中
你將會需要處理選取照片、及使用 Notifications 將照片傳遞給 ListIconController。
class IconOtherController: UIViewController {
  override func viewDidLoad() {
    super.viewDidLoad()
  }

  @IBAction func handleSelectPhoto(_ sender: Any) {
    let imagePC = UIImagePickerController()
    imagePC.delegate = self
    imagePC.allowsEditing = true
    present(imagePC, animated: true, completion: nil)
  }
}

extension IconOtherController: UIImagePickerControllerDelegate, UINavigationControllerDelegate {
  func imagePickerController(_ picker: UIImagePickerController, didFinishPickingMediaWithInfo info: [UIImagePickerController.InfoKey : Any]) {
    if let edditedImage = info[UIImagePickerController.InfoKey.editedImage] as? UIImage {
      let iconDict: [String: UIImage] = ["iconDict": edditedImage]
      NotificationCenter.default.post(name: Notification.Name(rawValue: "iconImage"), object: nil, userInfo: iconDict)
    }
    if let originalImage = info[UIImagePickerController.InfoKey.originalImage] as? UIImage {
      let iconDict: [String: UIImage] = ["iconDict": originalImage]
      NotificationCenter.default.post(name: Notification.Name(rawValue: "iconImage"), object: nil, userInfo: iconDict)
    }
    dismiss(animated: true, completion: nil)
  }

  func imagePickerControllerDidCancel(_ picker: UIImagePickerController) {
    dismiss(animated: true, completion: nil)
  }
}
在 IconColorController 之中
你將會展示一個集合視圖,並在集合視圖中顯示所有顏色,當顏色被選取時,你也需要使用 Notifications 來傳遞它。
class IconColorController: UIViewController {
  let collectionView: UICollectionView = {
    // Construct a collectionView
  }()
  let cellId = "ColorCell"
  let colorsTable: [Int: [UIColor]] = []//Colors

  override func viewDidLoad() {
    super.viewDidLoad()
    setupCollectionView()
  }

  fileprivate func setupCollectionView() {
    // collectionView AutoLayout...
    // setup collectionView FlawLayout properties..
    self.collectionView.dataSource = self
    self.collectionView.delegate = self
    self.collectionView.register(IconChooseColorCell.self, forCellWithReuseIdentifier: cellId)
  }
}

extension IconColorController: UICollectionViewDelegate, UICollectionViewDataSource, UICollectionViewDelegateFlowLayout {
  //..

  func collectionView(_ collectionView: UICollectionView, didSelectItemAt indexPath: IndexPath) {
    guard let colors = colorsTable[indexPath.row] else { fatalError("Colors table erro") }
    let colorDataDict:[String: [UIColor]] = ["colorDict": [colors[0], colors[1]]]
    NotificationCenter.default.post(name: NSNotification.Name(rawValue: "colorRefersh"), object: nil, userInfo: colorDataDict)
  }

  //..
}
當然,也別忘記創建一個 collectionViewCell。
class IconChooseColorCell: UICollectionViewCell {
  let view: UIImageView = {
    let cv = UIImageView()
    cv.translatesAutoresizingMaskIntoConstraints = false
    return cv
  }()

  override init(frame: CGRect) {
    super.init(frame: frame)
    setupView()
  }

  required init?(coder aDecoder: NSCoder) {
    fatalError("init(coder:) has not been implemented")
  }

  fileprivate func setupView() {
    self.addSubview(view)
    NSLayoutConstraint.activate([
      view.topAnchor.constraint(equalTo: self.topAnchor),
      view.bottomAnchor.constraint(equalTo: self.bottomAnchor),
      view.leftAnchor.constraint(equalTo: self.leftAnchor),
      view.rightAnchor.constraint(equalTo: self.rightAnchor),
      ])
  }
}
在 IconGlyphController 之中
首先,你需要加入圖片到專案之中。我從 FlatIcon 下載了免費的圖片包,將它們拖曳並加入到專案資料夾之中。
依照與選取圖示相同的模式來選取背景顏色。在列表中選取字型時,你將會藉由 Notifications 來傳遞它。
class IconGlyphController: UIViewController {
  let collectionView: UICollectionView = {
    // Construct a collectionView
  }()
  let cellId = "ColorCell"
  let iconsNames = [] //Icon Names

  override func viewDidLoad() {
    super.viewDidLoad()
    setupCollectionView()
  }

  fileprivate func setupCollectionView() {
    // collectionView AutoLayout...
    // setup collectionView FlawLayout properties..
    self.collectionView.dataSource = self
    self.collectionView.delegate = self
    self.collectionView.register(IconChooseColorCell.self, forCellWithReuseIdentifier: cellId)
  }
}

extension IconGlyphController: UICollectionViewDelegate, UICollectionViewDataSource, UICollectionViewDelegateFlowLayout {
  //..

  func collectionView(_ collectionView: UICollectionView, cellForItemAt indexPath: IndexPath) -> UICollectionViewCell {
    let cell = collectionView.dequeueReusableCell(withReuseIdentifier: cellId, for: indexPath) as! IconChooseColorCell
    DispatchQueue.main.async {
      cell.view.image = UIImage(named: self.iconsNames[indexPath.row])
      cell.view.image = cell.view.image?.withRenderingMode(.alwaysTemplate)
      cell.view.tintColor = #colorLiteral(red: 0.1764705926, green: 0.4980392158, blue: 0.7568627596, alpha: 1)
    }
    return cell
  }

  func collectionView(_ collectionView: UICollectionView, didSelectItemAt indexPath: IndexPath) {
    let selectedIcon = UIImage(named: iconsNames[indexPath.row])!
    let iconDict: [String: UIImage] = ["iconDict": selectedIcon]
    NotificationCenter.default.post(name: Notification.Name(rawValue: "iconRefresh"), object: nil, userInfo: iconDict)
  }

  //..
}
在 ListIconController 之中
你需要解析來自於 notification observers 的資訊。
class ListIconController: UIViewController {
  //..
  @objc private func handleChangeColor(notification:  Notification) {
    guard let colorDict = notification.userInfo else { return }
    guard let colors = colorDict["colorDict"] as? [UIColor] else { return }
    firstColorData = colors[0].encode()
    secondColorData = colors[1].encode()
    iconView.backgroundImage.image = nil
    setIconGradient(colorOne: colors[0], colorTwo: colors[1])
  }

  @objc private func handleChangeIcon(notification: Notification) {
    guard let iconDict = notification.userInfo else { return }
    guard let image = iconDict["iconDict"] as? UIImage else { return }
    iconView.backgroundImage.image = nil
    iconView.image.image = image
    iconView.image.image = iconView.image.image?.withRenderingMode(.alwaysTemplate)
    iconView.image.tintColor = .white
    iconView.contentMode = .scaleAspectFit
  }

  @objc private func handleChangeImage(notification: Notification) {
    guard let iconDict = notification.userInfo else { return }
    guard let image = iconDict["iconDict"] as? UIImage else { return }
    isImage = true
    iconView.image.image = nil
    iconView.backgroundImage.image = image
  }
}
你也需要根據分段控制器處理更改的視圖。
class ListIconController: UIViewController {
  @IBOutlet weak var chooseColorView: UIView!
  @IBOutlet weak var chooseOtherView: UIView!
  @IBOutlet weak var chooseGlyphView: UIView!

  fileprivate func setupViews() {
    switchViews(firstView: 1.0, secondView: 0.0, thirdView: 0.0)
  }

  private func switchViews(firstView: CGFloat, secondView: CGFloat, thirdView: CGFloat) {
    chooseColorView.alpha = firstView
    chooseOtherView.alpha = thirdView
    chooseGlyphView.alpha = secondView
  }

  @IBAction func handleSelectView(_ sender: UISegmentedControl) {
    switch sender.selectedSegmentIndex {
    case 0:
      switchViews(firstView: 1.0, secondView: 0.0, thirdView: 0.0)
      break
    case 1:
      switchViews(firstView: 0.0, secondView: 1.0, thirdView: 0.0)
      break
    case 2:
      switchViews(firstView: 0.0, secondView: 0.0, thirdView: 1.0)
      break
    default:
      break
    }
  }
}
而另一個必要的步驟,就是將數據儲存到 CoreData,並將 UIView 渲染成圖片。你也可以檢查一下是否已經有儲存的圖片可以將其載入,而不需用新的圖片。
  @IBAction func handleDone(_ sender: Any) {
    let renderer = UIGraphicsImageRenderer(size: iconView.bounds.size)
    let image = renderer.image { ctx in
      iconView.drawHierarchy(in: iconView.bounds, afterScreenUpdates: true)
    }
    let finalIconDict: [String: UIImage] = ["finalIcon": image]
    NotificationCenter.default.post(name: NSNotification.Name("finalIcon"), object: nil, userInfo: finalIconDict)
    if list != nil {
      let context = CoreDataManager.shared.persistentContainer.viewContext
      let imageData = image.jpegData(compressionQuality: 0.8)
      list?.setValue(imageData, forKey: "imageData")
      do {
        try context.save()
        navigationController?.popViewController(animated: true)
      } catch let err {
        print(err)
      }
    } else {
      navigationController?.popViewController(animated: true)
    }
  }
你也需要創建一個有漸層背景的圖示視圖。
@IBDesignable
class IconView: UIView {

  @IBInspectable
  var topColor: UIColor = .clear {
    didSet {
      updateViews()
    }
  }

  @IBInspectable
  var bottomColor: UIColor = .clear {
    didSet {
      updateViews()
    }
  }

  let image: UIImageView = {
    let im = UIImageView()
    im.contentMode = .scaleAspectFit
    im.translatesAutoresizingMaskIntoConstraints = false
    return im
  }()

  let backgroundImage: UIImageView = {
    let im = UIImageView()
    im.contentMode = .scaleAspectFill
    im.translatesAutoresizingMaskIntoConstraints = false
    return im
  }()

  override class var layerClass: AnyClass {
    get {
      return CAGradientLayer.self
    }
  }

  private func updateViews() {
    let layer = self.layer as! CAGradientLayer
    layer.colors = [topColor.cgColor, bottomColor.cgColor]
    setupImageView()
    setupBackgroundImage()
  }

  private func setupImageView() {
    self.addSubview(image)
    NSLayoutConstraint.activate([
      image.centerXAnchor.constraint(equalTo: self.centerXAnchor),
      image.centerYAnchor.constraint(equalTo: self.centerYAnchor),
      image.heightAnchor.constraint(equalToConstant: 70),
      image.widthAnchor.constraint(equalToConstant: 70)
      ])
  }

  private func setupBackgroundImage() {
    self.addSubview(backgroundImage)
    NSLayoutConstraint.activate([
      backgroundImage.topAnchor.constraint(equalTo: self.topAnchor),
      backgroundImage.bottomAnchor.constraint(equalTo: self.bottomAnchor),
      backgroundImage.leftAnchor.constraint(equalTo: self.leftAnchor),
      backgroundImage.rightAnchor.constraint(equalTo: self.rightAnchor)
      ])
  }
}
更新擴展檔案使其符合下列形式:
public extension UIColor {
  convenience init(r: CGFloat, g: CGFloat, b: CGFloat) {
    self.init(red: r/255, green: g/255, blue: b/255, alpha: 1)
  }
  static var customBackgroundColor: UIColor = {
    return UIColor(r: 239, g: 239, b: 244)
  }()
  convenience init(hexString: String, alpha: CGFloat = 1) {
    assert(hexString[hexString.startIndex] == "#", "Expected hex string of format #RRGGBB")
    let scanner = Scanner(string: hexString)
    scanner.scanLocation = 1  // skip #
    var rgb: UInt32 = 0
    scanner.scanHexInt32(&rgb)
    self.init(
      red:   CGFloat((rgb & 0xFF0000) >> 16)/255.0,
      green: CGFloat((rgb &   0xFF00) >>  8)/255.0,
      blue:  CGFloat((rgb &     0xFF)      )/255.0,
      alpha: alpha)
  }
  func toHexString() -> String {
    var r:CGFloat = 0
    var g:CGFloat = 0
    var b:CGFloat = 0
    var a:CGFloat = 0
    getRed(&r, green: &g, blue: &b, alpha: &a)
    let rgb:Int = (Int)(r*255)<<16 | (Int)(g*255)<<8 | (Int)(b*255)<<0
    return String(format:"#%06x", rgb)
  }
  class func color(data:Data) -> UIColor? {
    return try? NSKeyedUnarchiver.unarchiveTopLevelObjectWithData(data) as? UIColor
  }
  func encode() -> Data? {
    return try? NSKeyedArchiver.archivedData(withRootObject: self, requiringSecureCoding: false)
  }
  static func hexStringToUIColor (hex:String) -> UIColor {
    var cString:String = hex.trimmingCharacters(in: .whitespacesAndNewlines).uppercased()
    if (cString.hasPrefix("#")) {
      cString.remove(at: cString.startIndex)
    }
    if ((cString.count) != 6) {
      return UIColor.gray
    }
    var rgbValue:UInt32 = 0
    Scanner(string: cString).scanHexInt32(&rgbValue)
    return UIColor(
      red: CGFloat((rgbValue & 0xFF0000) >> 16) / 255.0,
      green: CGFloat((rgbValue & 0x00FF00) >> 8) / 255.0,
      blue: CGFloat(rgbValue & 0x0000FF) / 255.0,
      alpha: CGFloat(1.0)
    )
  }
}

extension UIView {
  func setGradientBackgroundColor(colorOne: UIColor, colorTow: UIColor) {
    let gradientLayer = CAGradientLayer()
    gradientLayer.frame = bounds
    gradientLayer.colors = [colorOne.cgColor, colorTow.cgColor]
    gradientLayer.locations = [0.0, 1.0]
    gradientLayer.endPoint = CGPoint(x: 1.0, y: 1.0)
    gradientLayer.startPoint = CGPoint(x: 0.0, y: 0.0)
    layer.insertSublayer(gradientLayer, at: 0)
  }
  func makeRoundedCorners() {
    self.layer.cornerRadius = (self.frame.width / 2)
    self.layer.masksToBounds = true
  }
  func makeRoundedCorners(by value: Int) {
    self.layer.cornerRadius = CGFloat(value)
    self.layer.masksToBounds = true
  }
}
// Autolayout helpers...最後,來到 ViewController.swift,我們需要更新一些內容。
在 viewDidLoad 和 viewWillAppear 兩個方法之中,你需要加入下面這行程式碼,才能夠從 CoreData 獲取列表物件。
self.lists = CoreDataManager.shared.fetchLists()你也需要遵從 CreateListControllerDelegate,並實作 didAddList() 函式。
extension ViewController: CreateListControllerDelegate {
  func didAddList(list: List) {
    self.collectionView.performBatchUpdates({
      let indexPath = IndexPath(row: lists.count - 1, section: 0)
      self.collectionView.insertItems(at: [indexPath])
    }, completion: nil)
  }
}
最終成果與結論
終於,在完成許多工作之後,我實現了製作一個創建圖示系統的目標。它在許多 App 當中真的相當便利,為使用者帶來了出色的體驗。
我對於最終成果感到非常滿意,或許有更簡單的方法可以達到相同的效果,所以如果你有任何意見,請在下面留言。
另外請記住,如果你不是設計師,你可以購買一些出色的 iOS App 模板,如果你對 React Native App 模板 更感興趣,也可以從網站上購買。
改善空間
我們的 App 其實還有很大的改善空間,像是優化程式碼、或加入編輯列表和刪除列表等新功能。
你可以從 GitHub 下載專案,為專案添加功能後提交 Pull Request。我非常期待大家提交 PR!
另外,我也想在這裡特別感謝 Mohammed ElNaggar 的幫助!
LinkedIn: https://www.linkedin.com/in/hengjiewang/
Facebook: https://www.facebook.com/hengjie.wang