開發 iOS 的過程中,常常會有彈出 Alert 讓使用者選擇的需求,又需要知道使用者選擇了哪一個,卻遇到各種彈出都要一直callback callback 嗎?每次選項都很難掌握,多個選項還要自行客製化,也很難復用,只能一個畫面刻一個?
在本篇教學文章中,我們會了解到幾個要點並實作:
- 建立統一入口 Alert 服務化,讓任何地方需要顯示與選擇時,都能輕易掌握使用呼叫。
- 客製化領域設計選項 (enum),不管是哪種商業邏輯都能很簡單地讓使用者做選擇,並且輕易掌握使用者選擇後的事件回應。
- Alert 服務自動讀取 enum 選項,並建置 UI Button 列表。
- 脫離傳統 UIAlertController callback 地獄,結合 PromiseKit 與 SwiftEntryKit 解偶系統服務與商業邏輯領域設計。
本篇文章將使用以下的工具、環境與第三方庫:
- Xcode 11
- macOS 10.15
- SwiftUI
- PromiseKit
- SwiftEntryKit
- 範例
建議大家參考範例程式碼消化服用呦!
前置工作
首先,讓我們建立一個展示用的 View,這次我們選擇使用 SwiftUI 來建立!
由於繪製畫面並不是我們這篇文章的重點,有興趣的讀者可以自行研究繪製 view 的程式碼。
開啟一個 SwiftUI 的初始專案,修改 ContentView 如下:
//
//  ContentView.swift
//  AlertComponentizationDemo
//
//  Created by yasuoyuhao on 2019/9/13.
//  Copyright © 2019 yasuoyuhao. All rights reserved.
//

import SwiftUI

struct ContentView: View {

    @State var show = false
    @State var viewState = CGSize.zero

    var body: some View {
        ZStack {

            TitleView()
                .blur(radius: show ? 20 : 0)
                .animation(.default)

            CardBottomView()
                .blur(radius: show ? 20 : 0)
                .animation(.default)

            CardView()
                .background(Color("background9"))
                .cornerRadius(10)
                .shadow(radius: 20)
                .offset(x: 0, y: -40)
                .scaleEffect(0.85)
                .rotationEffect(Angle(degrees: show ? 15 : 0))
                //                .rotation3DEffect(Angle(degrees: show ? 50 : 0), axis: (x: 10.0, y: 10.0, z: 10.0))
                .blendMode(.hardLight)
                .animation(.easeInOut(duration: 0.7))
                .offset(x: viewState.width, y: viewState.height)

            CardView()
                .background(Color("background8"))
                .cornerRadius(10)
                .shadow(radius: 20)
                .offset(x: 0, y: -20)
                .scaleEffect(0.9)
                .rotationEffect(Angle(degrees: show ? 10 : 0))
                //                .rotation3DEffect(Angle(degrees: show ? 40 : 0), axis: (x: 10.0, y: 10.0, z: 10.0))
                .blendMode(.hardLight)
                .animation(.easeInOut(duration: 0.5))
                .offset(x: viewState.width, y: viewState.height)


            CertificateView()
                .offset(x: viewState.width, y: viewState.height)
                .scaleEffect(0.95)
                .rotationEffect(Angle(degrees: show ? 5 : 0))
                //                .rotation3DEffect(Angle(degrees: show ? 30 : 0), axis: (x: 10.0, y: 10.0, z: 10.0))
                .animation(.spring())
                .onTapGesture {
                          // 點擊事件
            }
            .gesture(
                DragGesture()
                    .onChanged { value in
                        self.viewState = value.translation
                        self.show = true
                }
                .onEnded { value in
                    self.viewState = CGSize.zero
                    self.show = false
                }
            )
        }
    }
}

struct CertificateView: View {
    var body: some View {
        return VStack {

            HStack {
                VStack(alignment: .leading) {
                    Text("yasuoyuhao")
                        .font(.headline)
                        .fontWeight(.bold)
                        .foregroundColor(Color("accent"))
                        .padding(.top)
                    Text("Alert Demo")
                        .foregroundColor(.white)
                }
                Spacer()
            }
            .padding(.horizontal)

            Spacer()

            Image("Background")
                .resizable()
                .aspectRatio(contentMode: .fill)
                .frame(width: 340.0, height: 150, alignment: .center)
                .clipped()
        }
        .frame(width: 340.0, height: 220)
        .background(Color.black)
        .cornerRadius(10)
        .shadow(radius: 20)
    }
}


struct CardView: View {
    var body: some View {
        return VStack {
            Text("Card Back")
        }
        .frame(width: 300, height: 220)
        .cornerRadius(10)
        .shadow(radius: 20)
        .offset(x: 0, y: -20)

    }
}

struct TitleView : View {
    var body: some View {
        return VStack {
            HStack {
                Text("Alert Demo")
                    .font(.largeTitle)
                    .fontWeight(.heavy)
                Spacer()
            }
            Image("Illustration5")
                .resizable()
                .aspectRatio(contentMode: .fill)
                .frame(width: 210.0, height: 210.0, alignment: .center)
                .onTapGesture {
                    // 點擊事件
            }

            Spacer()
        }
        .padding()
    }
}

struct CardBottomView : View {
    var body: some View {
        return VStack(spacing: 20.0) {
            Rectangle()
                .frame(width: 60, height: 6)
                .cornerRadius(3.0)
                .opacity(0.1)
            Text("請點擊卡片、數據圖查看提示效果")
                .lineLimit(10)
            Spacer()
        }
        .frame(minWidth: 0, maxWidth: .infinity)
        .padding()
        .padding(.horizontal)
        .background(Color.white)
        .cornerRadius(30)
        .shadow(radius: 20)
        .offset(y: 600)
    }
}

#if DEBUG
struct ContentView_Previews: PreviewProvider {
    static var previews: some View {
        ContentView()
    }
}
#endif
其中有需要的圖片資源都在範例程式碼中,請記得取呦!現在我們應該可以看到以下畫面了!
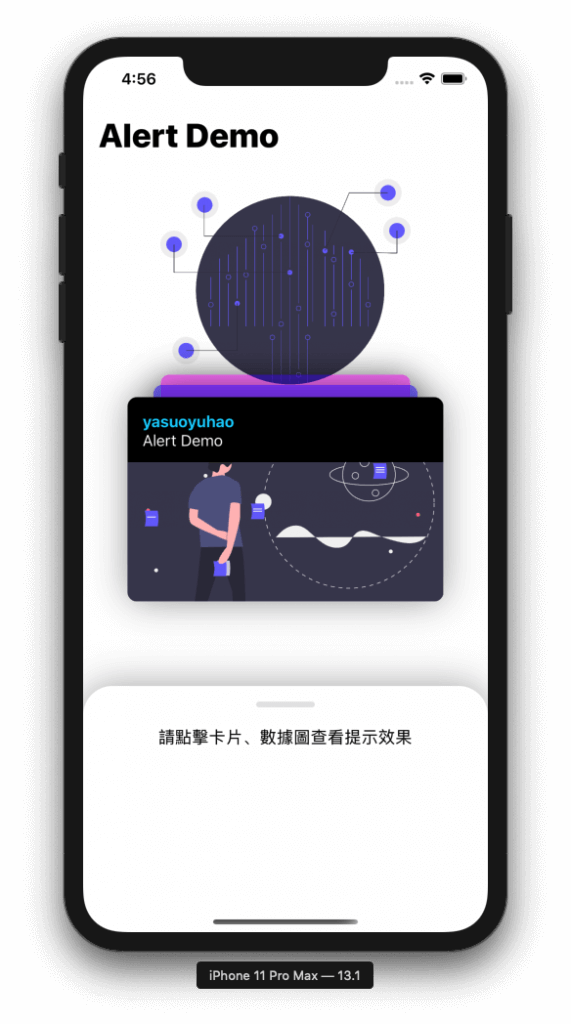
嗯,非常不錯!這次我們稍微設計了一下展示畫面與動畫,讓整體而言不要那麼枯燥!
設計思路
寫程式碼前我們通常需要設計一番,並思考需要哪些功能,而決定要應用怎麼樣的設計模式。
首先,我們先來分析需求!
需求 1:我們想要有一個不耦合於任何組件的 Alert
需求 2:我們想要有一個服務專門提供接口,上層只要提供選項與數據,由這一層服務幫我們完成繪製畫面,並回傳使用者選擇的選項
需求 3:這個選項應該要可以隨意擴充,以及應對不同商業邏輯的選項組合
需求 4:我們想要回傳選項時,可以讓流程很好的執行,不會造成 callback hell
為此,我們集成了兩個很常用的第三方組件 PromiseKit 與 SwiftEntryKit,來解決我們的需求。
實作服務層
首先,我們先建立一個 class 為服務層入口 MessageService,並且我們使用單例模式來處理需求 1。
class MessageService {

    static let shared = MessageService()

    private init() { }
}
接下來,我們實作 SwiftEntryKit 的容器:
fileprivate let attributesPopUp: EKAttributes = {
        var attributes = EKAttributes.centerFloat
        attributes.windowLevel = .alerts
        attributes.hapticFeedbackType = .success
        attributes.screenInteraction = .absorbTouches
        attributes.entryInteraction = .absorbTouches
        attributes.scroll = .disabled
        attributes.screenBackground = .color(color: EKColor.white.with(alpha: 0.5))
        attributes.entryBackground = .color(color: EKColor.white.with(alpha: 0.98))
        attributes.entranceAnimation = .init(scale: .init(from: 0.9,
                                                          to: 1,
                                                          duration: 0.4,
                                                          spring: .init(damping: 0.8,
                                                                        initialVelocity: 0)),
                                             fade: .init(from: 0,
                                                         to: 1,
                                                         duration: 0.3))
        attributes.exitAnimation = .init(scale: .init(from: 1,
                                                      to: 0.4,
                                                      duration: 0.4,
                                                      spring: .init(damping: 1,
                                                                    initialVelocity: 0)),
                                         fade: .init(from: 1,
                                                     to: 0,
                                                     duration: 0.2))
        attributes.displayDuration = .infinity
        attributes.positionConstraints.maxSize = .init(width: .constant(value: UIScreen.main.bounds.maxX), height: .fill)
        return attributes
    }()
EKAttributes 是 SwiftEntryKit 設計中的一塊組件,它是整個 Alert 的容器,裡面可以放置其他 SwiftEntryKit 設計好的 view 或客製化 view,建議搭配官方文檔作參考。
接下來,我們建置一個 function,用來呼叫我們理想中的 Alert:
func showTableSelectionView<T: RawCaseable>(title: String, description: String, data: T.Type, image: UIImage? = nil, imageSize: CGSize = CGSize(width: 80, height: 80), isHaveCancel: Bool = true) -> Promise<T> where T.RawValue == String {

}
showTableSelectionView 是一個泛型方法,範圍於 RawCaseable 內。RawCaseable 是我們自己定義的一個 protocol,用於生成選項列舉。
protocol RawCaseable: RawRepresentable, CaseIterable { }對於 RawRepresentable 與 CaseIterable 的協定內容,可以參考官方文檔。這是為了方便於讓 enum 可以使用 foreach,來處理不特定數量與不特定標題的方式。
其中各個參數代表不同的東西:
title代表這個Alert的顯示標題文字description代表描述文字data代表列舉選項的目標型別image代表Alert的圖示imageSize用於設定image的大小isHaveCancel代表是否要顯示取消的選項,預設是true,並會返回一個Promise,可以接續選擇後的處理流程
接下來,讓我們進入重點!
首先,建立一個 Promise:
return Promise<T>.init(resolver: { (resolver) in

})
然後,我們開始根據傳入值繪製 Alert:
return Promise<T>.init(resolver: { (resolver) in
            let title = EKProperty.LabelContent(text: title, style: .init(font: .systemFont(ofSize: 16), color: .black, alignment: .center))
            let description = EKProperty.LabelContent(text: description, style: .init(font: PopUpMessageFont.shared.subTitleFont, color: EKColor.black.with(alpha: 0.98), alignment: .center))

            let buttonFont: UIFont = .systemFont(ofSize: 16)
            let buttonColor: EKColor = EKColor.init(red: 0, green: 66, blue: 188)

            let image = EKProperty.ImageContent.init(image: image ?? #imageLiteral(resourceName: "icons8-swift"), size: CGSize(width: imageSize.width, height: imageSize.height), contentMode: .scaleAspectFit, makesRound: true)
            let simpleMessage = EKSimpleMessage(image: image, title: title, description: description)

            var buttonsBarContent = EKProperty.ButtonBarContent(with: [], separatorColor: buttonColor.with(alpha: 0.2), expandAnimatedly: true)

            // Close button
            if isHaveCancel {

                let closeButtonLabelStyle = EKProperty.LabelStyle(font: buttonFont, color: EKColor.black.with(alpha: 0.8))
                let closeButtonLabel = EKProperty.LabelContent(text: "取消", style: closeButtonLabelStyle)
                let closeButton = EKProperty.ButtonContent(label: closeButtonLabel, backgroundColor: .clear, highlightedBackgroundColor: EKColor.white.with(alpha: 0.05)) {

                    resolver.reject(UIError.userDoIsCancal)

                    SwiftEntryKit.dismiss()
                }

                buttonsBarContent.content.append(closeButton)
            }
})
根據官方文檔,我們將 title、description、image、isHaveCancel 參數繪製成符合 App 中樣式的組件,並放入 simpleMessage 中。
我們可以看到取消中的執行方法為:
resolver.reject(UIError.userDoIsCancal)
SwiftEntryKit.dismiss()
這代表我們 resolver.reject 了 Promise,並且關閉了 Alert。
接著,進入重頭戲 —— 繪製我們的商業邏輯領域選項:
T.allCases.forEach { (item) in
                let controlButtonLabelStyle = EKProperty.LabelStyle(font: buttonFont, color: buttonColor)
                let controlButtonLabel = EKProperty.LabelContent(text: NSLocalizedString(item.rawValue, comment: ""), style: controlButtonLabelStyle)
                let controlButton = EKProperty.ButtonContent(label: controlButtonLabel, backgroundColor: .clear, highlightedBackgroundColor: buttonColor.with(alpha: 0.05)) {
                    SwiftEntryKit.dismiss()

                    resolver.fulfill(item)
                    return
                }

                buttonsBarContent.content.append(controlButton)
            }
這邊我們利用了剛剛設置好的協定,實現繪製選項與選項標題,並且於返回值 resolver.fulfill 使用者選的選項,加入到了 buttonsBarContent.content 列表,並且關閉了 Alert!
最後,讓我們 display 繪製好的 Alert:
let alertMessage = EKAlertMessage(simpleMessage: simpleMessage, buttonBarContent: buttonsBarContent)

            // Setup the view itself
            let contentView = EKAlertMessageView(with: alertMessage)

            DispatchQueue.main.asyncAfter(deadline: .now() + 0.05) {
                SwiftEntryKit.display(entry: contentView, using: self.attributesPopUp)
            }
大功告成!我們完成了統一、而可復用的 Alert!
整個 function 如下:
func showTableSelectionView<T: RawCaseable>(title: String, description: String, data: T.Type, image: UIImage? = nil, imageSize: CGSize = CGSize(width: 80, height: 80), isHaveCancel: Bool = true) -> Promise<T> where T.RawValue == String {

        return Promise<T>.init(resolver: { (resolver) in
            let title = EKProperty.LabelContent(text: title, style: .init(font: .systemFont(ofSize: 16), color: .black, alignment: .center))
            let description = EKProperty.LabelContent(text: description, style: .init(font: PopUpMessageFont.shared.subTitleFont, color: EKColor.black.with(alpha: 0.98), alignment: .center))

            let buttonFont: UIFont = .systemFont(ofSize: 16)
            let buttonColor: EKColor = EKColor.init(red: 0, green: 66, blue: 188)

            let image = EKProperty.ImageContent.init(image: image ?? #imageLiteral(resourceName: "icons8-swift"), size: CGSize(width: imageSize.width, height: imageSize.height), contentMode: .scaleAspectFit, makesRound: true)
            let simpleMessage = EKSimpleMessage(image: image, title: title, description: description)

            var buttonsBarContent = EKProperty.ButtonBarContent(with: [], separatorColor: buttonColor.with(alpha: 0.2), expandAnimatedly: true)

            // Close button
            if isHaveCancel {

                let closeButtonLabelStyle = EKProperty.LabelStyle(font: buttonFont, color: EKColor.black.with(alpha: 0.8))
                let closeButtonLabel = EKProperty.LabelContent(text: "取消", style: closeButtonLabelStyle)
                let closeButton = EKProperty.ButtonContent(label: closeButtonLabel, backgroundColor: .clear, highlightedBackgroundColor: EKColor.white.with(alpha: 0.05)) {

                    resolver.reject(UIError.userDoIsCancal)

                    SwiftEntryKit.dismiss()
                }

                buttonsBarContent.content.append(closeButton)
            }

            T.allCases.forEach { (item) in
                let controlButtonLabelStyle = EKProperty.LabelStyle(font: buttonFont, color: buttonColor)
                let controlButtonLabel = EKProperty.LabelContent(text: NSLocalizedString(item.rawValue, comment: ""), style: controlButtonLabelStyle)
                let controlButton = EKProperty.ButtonContent(label: controlButtonLabel, backgroundColor: .clear, highlightedBackgroundColor: buttonColor.with(alpha: 0.05)) {
                    SwiftEntryKit.dismiss()

                    resolver.fulfill(item)
                    return
                }

                buttonsBarContent.content.append(controlButton)
            }

            let alertMessage = EKAlertMessage(simpleMessage: simpleMessage, buttonBarContent: buttonsBarContent)

            // Setup the view itself
            let contentView = EKAlertMessageView(with: alertMessage)

            DispatchQueue.main.asyncAfter(deadline: .now() + 0.05) {
                SwiftEntryKit.display(entry: contentView, using: self.attributesPopUp)
            }

        })
    }
使用接口
讓我們回到剛剛繪製好的 view 來執行 Alert 吧!我們建立一個 enum FoodKind 模擬使用者點餐的選項:
enum FoodKind: String, RawCaseable {
    case steak = "牛排"
    case chickenChops = "雞排"
    case italianNoodles = "義大利麵"
    case hainanChickenRice = "海南雞飯"
}
找到 CertificateView 的 onTapGesture 並且寫入:
_ = MessageService.shared.showTableSelectionView(title: "餐點", description: "請選擇你的餐點", data: FoodKind.self).done { (kind) in

                        print("你選擇了: \(kind.rawValue)")

                        // to something for your seletion
                        switch kind {

                        case .steak:
                            ()
                        case .chickenChops:
                            ()
                        case .italianNoodles:
                            ()
                        case .hainanChickenRice:
                            ()
                        }
                    }.catch({ (error) in
                        if let error = error as? UIError {
                            print(error.localizedDescription)
                        }
                    })
此時,執行並點擊卡片,就會出現以下畫面:
試著點擊牛排或取消,你會發現我們可以知道使用者選取了甚麼:
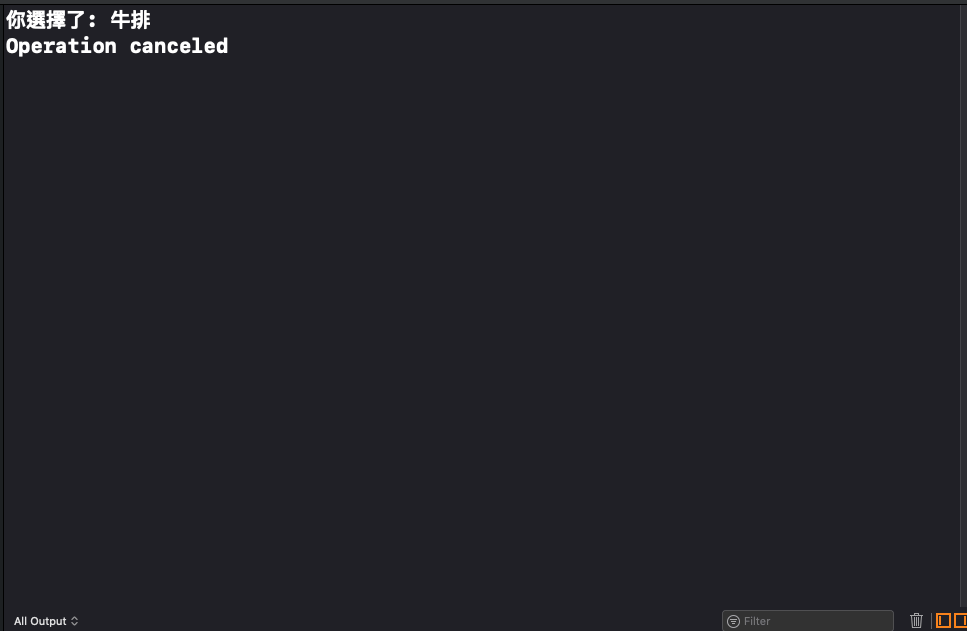
讓我們再感受一下它的強大!我們建立遊戲職業種類的 enum HeroKind:
enum HeroKind: String, RawCaseable {
    case fighter = "鬥士"
    case assassin = "刺客"
    case mage = "法師"
    case shooter = "射手"
    case support = "輔助"
}
找到 TitleView 中的 Image onTapGesture 寫入:
_ = MessageService.shared.showTableSelectionView(title: "英雄", description: "請選擇您的英雄職位", data: HeroKind.self).done { (hero) in
                        print("你選擇了: \(hero.rawValue)")

                        switch hero {

                        case .fighter:
                            ()
                        case .assassin:
                            ()
                        case .mage:
                            ()
                        case .shooter:
                            ()
                        case .support:
                            ()

                        }
                    }.catch({ (error) in
                        if let error = error as? UIError {
                            print(error.localizedDescription)
                        }
                    })
點一下圖,我們可以看到以下畫面:
恭喜你!我們已經解決了所有的需求,就是建立樣式統一、可復用、可自由擴充選項的 Alert!
總結
本文所闡述的設計理念並不困難,我覺得實現程式碼時,先描述需求與設計思路是更重要的。有了明確的需求與設計思路,我們就可以很好地解決問題。如果在設計中遇到沒有想到的問題,我們可以透過反覆迭代與設計去解決複雜問題。希望這篇文章有帶給你幫助。感謝你的閱讀,祝你有個美好的 Coding 夜晚,下次見。