

什麼是協定 (Protocol)?
根據 Apple 官方文件說明:
協定用於定義統一方法、屬性、和其他要求,以實作特定任務或功能。類別、結構、和列舉都可以遵循協定,並供具體實作來滿足協定定義的要求。任何滿足協定要求的型別,就可以說是遵循該協定。
遵循協定的型別除了必須實作的要求外,你還可以擴展協定來實作部分要求或附加功能,供符合的型別使用。
其實你在 Swift 語言中,早已見過協定無數次了。還記得構建基本的 table view 的 UITableViewDelegate 和 UITableViewDataSource 嗎?如果你有在 Apple 框架看過這兩個協定,你會知道他們的方法有必要 (Required) 和可選 (Optional) 兩種。
在 UITableViewDataSource 同時按下 command (⌘) 和滑鼠左鍵,你將會看到這些選項:
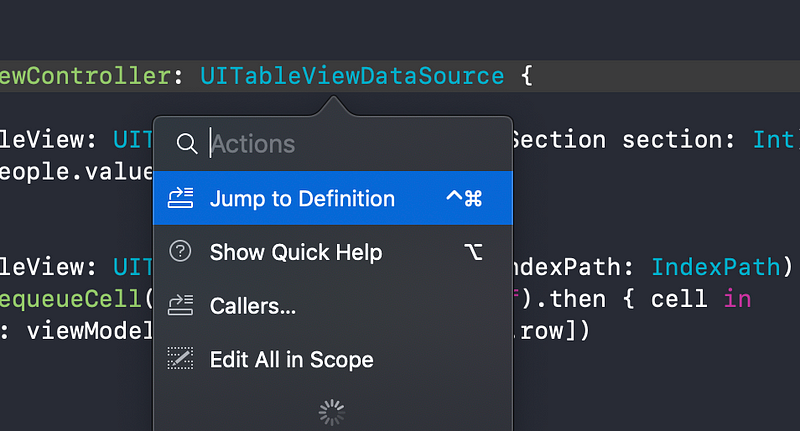
按下 Jump to Definition,你將會看到他們的協定方法:

這是一個在 Swift 協定的範例。現在讓我們來深入了解它,看看如何建立我們自己的協定方法、以及如何把它應用到專案中。
如何建立你的協定?
讓我們看在類別中打出 Protocol,然後你會看到如下圖的畫面:

選擇第一個選項或按 enter 後,就會出現這樣的畫面:
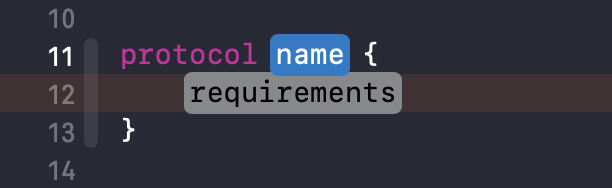
現在,寫上協定的名字,並按你所想來利用方法與變數編寫協定要求。我已經創建了一個名為 DeveloperEntryDelegate 的協定,並採用 AnyObject。如果你想把協定方法設為 weak,你才需要採用 AnyObject,否則你可以忽略這一步。
宣告協定:
protocol DeveloperEntryDelegate{
    func textDeveloperPlatform(_ text: String)
    func textDeveloperLanguage(_ text: String)
}
應用到類別上
weak var delegate: DeveloperEntryDelegate?
如果你宣告一個 weak 協定,你將會看到這個錯誤訊息:

利用協定型別 AnyObject 來修正這個錯誤
protocol DeveloperEntryDelegate: AnyObject {
    func textDeveloperPlatform(_ text: String)
    func textDeveloperLanguage(_ text: String)
}
現在,你可以看到我們要準備宣告的類別了。
實作過程
基本上,我們所使用的委派功能進行回調,以便將數值或方法從一個呼叫傳遞到另一個類別。這個過程是個一對一的溝通。
在這個範例中,我們可以看到第一個視圖導移到第二個視圖的動作,並在 textfields 填入資料。在 secondViewController 中按下 Done 按鈕後,委派方法會把 textfields 的資料與 DeveloperEntryDelegate 協定方法一併回傳到 FirstViewController。所以當你想要把一些改變從一個視圖送到另一個視圖時,委派功能就大派用場了,而且使用方法亦非常簡單。你可以在 Github 找到這個範例。
在 FirstViewController 內:
class FirstViewController: UIViewController {
      @IBOutlet weak var labelPlatformDetails: UILabel!
      @IBOutlet weak var labelDeveloperLanguage: UILabel!
override func viewDidLoad() {
    super.viewDidLoad()
}

//MARK: - Navigation
@IBAction func actionAddDetail(_ sender: UIButton) {
   guard  let secondView = self.storyboard?.instantiateViewController(withIdentifier: "SecondViewController") as? SecondViewController else {
       fatalError("View Controller not found")}
secondView.delegate = self //Protocol conformation here
navigationController?.pushViewController(secondView, animated: true)}
}
//MARK: - Protocol Delegate Methods
extension FirstViewController: DeveloperEntryDelegate {
   func textDeveloperPlatform(_ text: String){
      labelPlatformDetails.text = "Platform: \(text)" }
func textDeveloperLanguage(_ text: String) {
    labelDeveloperLanguage.text = "Language: \(text)" }
}
在 SecondViewController 內:
protocol DeveloperEntryDelegate: AnyObject {
func textDeveloperPlatform(_ text: String)
func textDeveloperLanguage(_ text: String) }
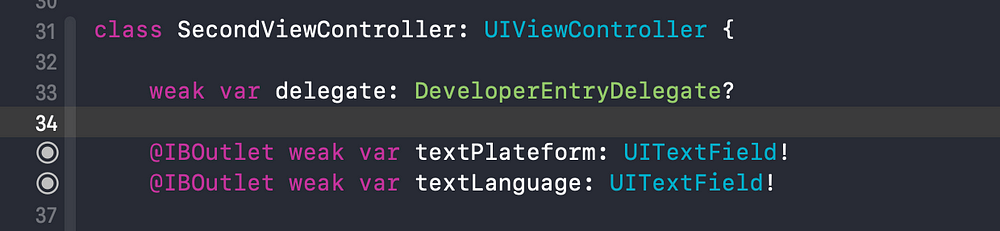
class SecondViewController: UIViewController {
weak var delegate: DeveloperEntryDelegate?
@IBOutlet weak var textPlateform: UITextField!
@IBOutlet weak var textLanguage: UITextField!
override func viewDidLoad() {
super.viewDidLoad() }
//MARK: - Action Pass back view Details
@IBAction func actionDone(_ sender: UIButton) {
self.navigationController?.popViewController(animated: true)
self.delegate?.textDeveloperPlatform(textPlateform.text ?? "")
self.delegate?.textDeveloperLanguage(textLanguage.text ?? "")
}
}
如何製作可選協定方法?
只要在你的協定加入 @objc,有了 @objc 可選方法就可以了 👍🏽!
@objc protocol DeveloperEntryDelegate: AnyObject {
   func textDeveloperPlatform(_ text: String)
   @objc optional func textDeveloperLanguage(_ text: String)
}
另一種為協定製作可選方法的方式,就是為你的可選協定方法建立一個擴展。😎 🎉
protocol DeveloperEntryDelegate: AnyObject {
    func textDeveloperPlatform(_ text: String)
    func textDeveloperLanguage(_ text: String) //optional method
}
//optional method
extension DeveloperEntryDelegate {
   func textDeveloperLanguage(_ text: String){}
}
總結
協定委派模式 (protocol delegation pattern) 是在 Apple 框架中最重要的功能,讓你輕易在程式碼內實現類別之間的溝通。我見過一些未有完整想法的開發者,將數據儲存於本機的 UserDefaults 或利用總體變數 (Global variables),來將資料從一個視圖傳遞到另一個視圖時。然而,如果你有本機儲存功能,再重覆獲取資料就會相當費時。所以為了提高效率,委派模式才是更佳的方法。🎉
讀過本篇教學後,我們已經明白了什麼是協定,深入了解過如何建立協定、以及如何與委派模式合作。我們也學會了可選與必要協定方法,一般來說,方法都默認設為是必要的,但如果你希望能讓方法更有彈性,那你可以設為可選的方法。我希望你能從本篇教學中獲益。😊✌🏼
感謝你閱讀本篇教學🙌🏼 如果你對於本篇教學有任何問題,或是有任何更好的建議,歡迎你在我的 Twitter 留言與我討論。