

在本篇教學中,我將會介紹一些最佳實踐 (best practice),助你在 Swift 中安全而有效率地使用類別(參考型別)和參考語意 (reference semantics)。雖然協定導向程式設計 (POP) 及數值語義現在十分流行,但是追隨新技術的同時,不代表你需要拋棄所有關於類別的設計方法。你也可以在類別中加入一些簡單的結構,像是複製建構器 (copy initializers)、預設建構器 (default initializers)、指定建構器 (designated initializers)、解構器 (deinitializers)、以及遵循 Equatable 協定 (protocols) 等。為了瞭解範例程式碼的真正含意,我將會在部分類別中採用這些結構,如此一來你就能夠在你的 iOS App 介面之中使用它們。
我將會逐步解釋整個過程:從建立不同的協定、到創建遵循這些協定的類別、以及在類別中實現繼承、並使用這些類別的實例(物件),以說明我的最佳實踐,並且示範一些你在設計類別時可能需要做的額外步驟。
盡量使用協定
定義及使用協定能夠使你在定義新的類別時,保持意圖清晰明確。這樣一來,當你或其他開發者在看你的類別註解時,就能夠立即從中得到有意義的資訊(例如:這個類別支援複製建構器)。我也希望把協定限制到只專注於一個目的;正因為我以不同要求細分各個協定,我的類別就可以依照需求來選擇需要遵循的協定多寡。
POP、OOP 和 POOP ?
請記住一個重點:大部分 iOS (以及 OS X)SDK 中的程式碼都是以類別階層形式所組成的。我相信大部分我們使用的核心框架都是由 Objective-C(及部份的 C++ 和 C)所編寫而成的 ,像是 Foundation 和 UIKit。
想像一下當我們創建一個使用 Single View App 模版的 Xcode 專案,大多數的開發者會從這個新專案中的哪一個檔案開始編寫呢?沒錯,就是 ViewController.swift 檔。當我們點選這個檔案後,第一眼看到的又是什麼?我們會看到 UIViewController 的子類別 ViewController。
Apple 又是怎麼描述 ViewController 的呢?看看這裡吧:
⋯⋯ 你很少會直接創建一個
UIViewController類別的實例;相反地,你會創建UIViewController為一個子類別,並且加入所需要的方法與屬性,以管理視圖控制器的視圖層級 ⋯⋯
每個 App 至少都會有一個UIViewController的容製化子類別,更常見的情況是會有許多個客製化視圖控制器。客製化視圖控制器定義了 App 中所有的行為,包括 App 的外觀以及如何回應使用者互動。
我們都很清楚 Apple 致力推動 POP、數值型別(結構和列舉)、和數值語義等概念,不過類別(參考型別)、參考語義和物件導向程式設計 (OOP) 的概念還是會繼續存在。
每隔一段時間,總是會有新的程式設計風潮出現,而我唯一關心的就是:POP 是真的有幫助、還是只是另一種行銷策略?到目前為止,它確實是對我產出的程式碼有用,但也不是所有情況都有幫助。
關於類別的一些議題
參考型別(類別)和參考語義可以是好、也可以是壞,取決於你的使用方法;實際上所有重要科技都各有優缺。用莎士比亞的話來說,就是:「複製還是不複製,這就是問題所在。」對於這個問題,我認為你必須先瞭解要處理的問題是什麼,若有複製的必要性,那就使用數值語義;若沒有複製的必要,那就使用參考語義。
即使 Apple 已經投向 POP 的懷抱,在 2015 WWDC 大會中一位 Apple 的工程師指出:「如果以一個視窗為例,複製一個視窗代表著什麼?」,這除了混亂之外並沒有其他涵義。確實,一個 UIViewController 子類別的實例副本代表甚麼、有甚麼用途?像是 UIViewController 和 NSWindow 這種實例應該保留在類別的形式。
假設你使用外觀設計模式,來為一個非常複雜的資料庫系統創建簡單介面和包裹器 (wrapper),而且所有購買了 App 的使用者都一定會用到這個系統。最直接的方式是在你的 App 之中使用參考的方式來傳遞這個資料庫。在 G-d 的名字之中,如果你編寫這個資料庫的數值型別(結構)版本,並將這個資料庫的基本結構和所有數據的副本給予 App 中的每個實例,將會是一場災難!
很明顯,類別在軟體開發領域中還是佔一席位的。請不要認為將類別作為一個結構中的成員屬性會是你想要的結果,那成員屬性會以參考語義的方式呈現。
類別所衍生的問題
你大概知道我將要說的是甚麼。這是一篇舊的 Swift 部落格貼文:
複製一個參考⋯⋯ 這意味著創建一個共享實例。在複製之後,兩個變數參考了同一個實例的數據,所以修改第二個變數的數據,就會影響原本的變數。
以下這個範例展示了參考語義的潛在危險。我將創建一個類別的實例,然後宣告一個變數參考它,接著再宣告另一個變數參考,設定第二個變數與前一個相等,最後得到兩個變數參考同一個實例的情況,更改第二個參考變數的成員屬性,這樣我們就可以看到第一個變數的屬性有對應的更動:
class Coordinate
{
    var x: Float
    var y: Float

    init( x: Float, y: Float ) {
        self.x = x
        self.y = y
    }
}

var coordinate = Coordinate(x: 2.0, y: 4.0)
print("coordinate:  (\(coordinate.x), \(coordinate.y))")
// coordinate:  (2.0, 4.0)

// Unintended mutation?
var coordinate1 = coordinate
coordinate1.y = 0.0

print("coordinate:  (\(coordinate.x), \(coordinate.y))")
// coordinate:  (2.0, 0.0)

print("coordinate1: (\(coordinate1.x), \(coordinate1.y))")
// coordinate1: (2.0, 0.0)

coordinate === coordinate1
// true
輸入了上面這段程式碼後,終端機會輸出:
coordinate:  (2.0, 4.0)
coordinate:  (2.0, 0.0)
coordinate1: (2.0, 0.0)
因為 coordinate 與 coordinate1 兩個物件同樣都參考 Coordinate(x: 2.0, y: 4.0) 敘述所創建出來的同一個物件,只要在參考內做變動,兩個物件就會同時更改。var coordinate1 = coordinate 這個敘述就是一個複製參考的範例。
注意我對邏輯 === 運算子的使用:
coordinate === coordinate1
// true
根據 Swift docs 的說明,=== 「會回傳一個布林值 (Boolean value),顯示兩個參考是否指向同一個物件實例。」在我們的情況當中,很明顯 coordinate 和 coordinate1 參考了同一個實例。請記住「相等性是從一致性所分離出來」,而且「一個類別實例的身分不是一個實例的値的一部分」。
就算是一個很小的 App,我也看過因為「意外共享 (unintended sharing)」而產生意想不到的變化,這種錯誤是因創建多重參考至同一個物件上、並改變了其中一個參考的屬性而發生的。這樣的行為在包含參考型別的多執行緒 (multi-threaded) 程式碼中,會特別難除錯。但,你可以使用數值類型編寫不好的程式碼。
在某些結構中,對第一個實例的更改、或是對副本的後續更改仍然可能是「無意的」。如果你最後獲得許多結構的副本怎麼辦?你的程式碼語義清晰、可以理解嗎?就連 Apple 也承認:「問題在於不變性有一些缺點。」
我們可以透過 Apple 版本的「防禦性複製 (defensive copying)」,來開始討論如何讓我們的類別更安全。我們可以讓所有的類別都遵循 NSCopying(和 NSObject)協定,並確保所有類別都有實作 copy(with:) 方法(或簡化成 copy()),並切記在每次指派時不斷呼叫 copy() 方法,而且呼叫時必須使用強制轉型:
let objectCopy = object.copy() as! ObjectType
請注意,防禦性複製普遍存在於 Cocoa 和 Objective-C 之中。仍然有許多開發者需要支援整個傳統的 iOS 和 OS X 程式碼函式庫,同時也有許多人需要跟這些程式碼互動。我們不會在本次的教學中使用 NSCopying。我不但會向你展示一些防禦性複製的程式碼,亦會展示許多其他的技術來讓你安全地使用類別。
從 Playground 開始著手
讓我們創建一個新的 Xcode playground。在 Xcode,到 File -> New > -> Playground…,點選 iOS 和 Single View 模版圖示。接著,按下 Next 按鈕,選擇 playground 儲存的位置,為 playground 命名並按下 Create 按鈕。你也可以直接下載我在 GitHub 上的範例檔。
在 playground 中輸入下列程式碼。請在標註「PUT SOME SPACES HERE」的位置多留幾行,以編寫本教學中基於類別的程式碼:
//: A UIKit based Playground for presenting user interface

import UIKit
import PlaygroundSupport

//
// PUT SOME SPACES HERE
//

class MyViewController : UIViewController {
...
現在將「PUT SOME SPACES HERE」註解的位置替換成 Copyable 協定和 Line 類別,如下所示:
//: A UIKit based Playground for presenting user interface

import UIKit
import PlaygroundSupport

protocol Copyable: class {

    func copy() -> Self

}

class Line {

    var beginPoint: CGPoint
    var endPoint: CGPoint

    init( beginPoint: CGPoint, endPoint: CGPoint ) {

        self.beginPoint = CGPoint( x: beginPoint.x, y: beginPoint.y )
        self.endPoint = CGPoint( x: endPoint.x, y: endPoint.y )

    }

} // end class Line

class MyViewController : UIViewController {
...
定義了起點和終點後,你應該能夠分辨這個類別的物件能否用來呈現幾何圖案和直線。我使用了 CGPoint 類別來表示我的起點和終點,所以這個類別對於繪畫/製圖有高度相容性。到目前為止,Line 類別只擁有一個指定建構器。
對於類別的最佳實踐
基於從 Swift 語言的進化中看到的證據、在 Swift 的個人經驗、以及觀察其他人使用 Swift 開發的過程所得,類別是不會消失的。透過使用類別 OOP 特性(繼承、抽象方法、及多型)所實現的功能都不會消失,因為它們太有用了!
讓我展示一些我用來在類別中減緩「意外共享」情況的技術,以及其它讓你編寫類別程式碼編寫得更好、語義更清晰的方式。這些內容都是我編寫 C++ 程式碼多年的經驗所得。
複製建構器 ── Copy Constructor (copy initializer)
你可能已經注意到,我一開始在 playground 之中加入了 Copyable 協定的程式碼。意外變異是參考語義最大的缺點,所以我們先從減緩類別的變異開始著手。請注意,我在 Copyable 協定中的 Self 使用了大寫「S」,而不是像 self 這樣使用小寫「s」。別誤會,這不是我的失誤。根據 Swift docs 的說明:「Self 指的是符合協定的最終型別。」。如果你還不是很清楚 Self 與 self 的分別,我建議你可以研究一下這個議題。
為何不明確地辨認出「意外共享」的「問題」,並且使用一個協定、讓遵循的類別實現「複製建構器」來進行語義描述?為了擺脫我過去的 C++ 經驗,我將使用 Swift 的術語來解說「複製建構器」。複製建構器允許我們透過一個類別的實例來創建另一個類別實例,被創造出來的新物件裡面包含了一模一樣的成員屬性、並且與另一個物件是同一個型別。讓我說得更清楚一些:一個完全獨立的物件複製品將會被製造出來。雖然新物件與原有物件包含相同的數據,但是會創造出一個新的實例(物件),而新的物件並不參考原有物件。它是一個複製品,而這些關於複製建構器的描述可以釐清你的觀念。
製作類別實例的副本會變成一種不可變更的形式。這樣一來,你之後作變更時,就可以該實例為基準作比較;亦可以在某些東西出錯時,復原實例狀態。
你可以注意到 Swift 似乎對於製作參考型別的副本(即一個類別實例的副本、或是一個物件的副本)不太友善。我不是在討論獲得類別的另一個參考,而是在說獲得一個類別實例完整、單獨的副本。這種對於類別複製不友善的情況並非偶然,Swift 的語言架構師希望語言本身的語法及語義都清晰明瞭,他們希望開發者都能夠確信參考型別和數值型別都能同時擁有 1) 獨特而明顯的意涵,而且兩種型別都能 2) 表現出一致的行為。然後,為甚麼我們不能夠安全地創造類別實例的副本呢?在本教學中,我將為你展示來自 C++ 複製建構器的概念。在 Swift 之中,我們也稱之為「複製初始器」。
Swift 在允許類別實例複製時非常困難:
重載預設的指派運算子(
=)是不可能的。
在 C++ 中,我會覆寫指派運算子來允許類別對其實例(也就是它們屬性的數值)進行深層複製,這樣可以幫助我避免非預期的變動。我也會創造一個複製建構器,我甚至可以透過將指派運算子設為 private 來關閉 C++ 中的賦值。Swift 不是 C++,但可以支持我的想法,但僅限於解構一個客製化版本的情況。
現在讓 Line 類別採用 Copyable 協定,而 Copyable 協定需要實作一個複製建構器:
protocol Copyable: class {

    func copy() -> Self

}

class Line : Copyable {

    var beginPoint: CGPoint
    var endPoint: CGPoint

    init( beginPoint: CGPoint, endPoint: CGPoint ) {

        self.beginPoint = CGPoint( x: beginPoint.x, y: beginPoint.y )
        self.endPoint = CGPoint( x: endPoint.x, y: endPoint.y )

    }

    func copy() -> Self {

        return type(of: self).init( beginPoint: self.beginPoint,
                                    endPoint: self.endPoint )

    }

} // end class Line
我想讓 copy() 使用 Line 類別目前的成員屬性來創建一個新的實例,並且回傳該實例。然而,它無法如常運作,所以我們要先清除下圖所示「使用元類型的值創建一個 “Self” 類別的物件時,必須使用 “required initializer”」的錯誤。

切記,Line 的子類別將會繼承 copy() 方法,而且 Copyable 協定會強制性實現方法,然後 copy() 呼叫指定建構器。請看看上圖當中,init 的第一個字母 i 被底線符號所劃記,指示我需要將它標記為 required ,因為根據 Swift 官方文件的說明:
在類別建構器的定義前面寫下
required修飾字,來指示出這個類別的所有子類別都必須實作這個建構器⋯⋯ 你也必須在每個子類別實作必須建構器 (required initializer) 前面加上required修飾字,來指示之後的子類別也需要實作必須建構器,而你在覆寫必須指定建構器時不需要在前面額外加上override修飾字⋯⋯
我將指定建構器標註為 required 後,程式碼就可以編譯了:
protocol Copyable: class {

    func copy() -> Self

}

class Line : Copyable {

    var beginPoint: CGPoint
    var endPoint: CGPoint

    required init( beginPoint: CGPoint, endPoint: CGPoint ) {

        self.beginPoint = CGPoint( x: beginPoint.x, y: beginPoint.y )
        self.endPoint = CGPoint( x: endPoint.x, y: endPoint.y )

    }

    func copy() -> Self {

        return type(of: self).init( beginPoint: self.beginPoint,
                                    endPoint: self.endPoint )

    }

} // end class Line
我寫了一些測試用的程式碼,我將輸出在每行對應的程式碼中標示為註解:
let line1 = Line(beginPoint: CGPoint(x: 20, y: 20), endPoint: CGPoint(x: 20, y: 200))
let lineCopy = line1.copy()
let line2 = line1
line2.beginPoint.x = 80
// line2.beginPoint = {x 80 y 20}
line1.beginPoint
// line1.beginPoint = {x 80 y 20}
lineCopy.beginPoint
// lineCopy.beginPoint = {x 20 y 20}
我建立了一個 Line 類別的實例,並讓 line1 獲得它的參考,然後將另一個參考 line2 連結到 Line 類別的實例,變更其中一個屬性的數值。當然,所有參考都能觀察到這個變動。
我使用了複製建構器取得一個 Line 類別實例的獨立副本,這個副本實際上是一個獨一無二的實例,改變副本 lineCopy 的數值並不會影響原本 line1 和 line2 所參考的那一個實例。
為了進一步證明我的複製建構器,我使用了三個等於符號的「相等運算子 (identical operator) (===)」來比較 line1 和 line2,同時也比較了 lineCopy 和 line1(不需要再和 line2 比較,它和 line1 是一樣的):
line1 === line2
// true
lineCopy === line1
// false
複製建構器是建構器的一種嗎?
你剛剛看到的 copy() 方法從技術層面來說並不算是建構器,你可以看到他雖然不是 init,但是卻呼叫了 init。它是一個創造類別實例之獨立副本的方法,他沒有複製參考,而是複製目前類別實例的內容,並且回傳一個全新的類別實例予以遵循 Copyable 協定。
以下這個協定需要一個真的複製建構器:
protocol Copyable: class
{
    init(copy: Self)
}
雖然這是我傾向用來創建複製建構器的方式,但是我發現在使用繼承的時候,這個方式會造成不必要、而且過度的複雜性。目前我還在修改這個方式,一旦它符合可讀性和可維護性標準時我會再讓大家知道。
繼承複製建構器
利用複製建構器創建子類別可能有點棘手,所以讓我們繼續前進,來釐清所需的概念。讓我們擴展原本的 Line 類別來包含一些屬性,這樣我們就更容易在 iOS App 的畫面上繪畫線條。我把子類別命名為 DrawableLine。雖然下面的程式碼看起來相當簡潔,但實際上它還存在著一些問題;解決了這些問題後,你將能更透徹地理解教學的主題和一般的類別:
class DrawableLine: Line
{

    var color: UIColor
    var width: CGFloat

    init( beginPoint: CGPoint, endPoint: CGPoint, color: UIColor, width: CGFloat )
    {
        self.color = color
        self.width = width
        super.init(beginPoint: beginPoint, endPoint: endPoint)
    }

    func copy() -> Self
    {
        return type(of: self).init( beginPoint: beginPoint,
                                    endPoint: endPoint,
                                    color: color,
                                    width: width )
    }

} // end class DrawableLine
我需要處理以下這三個由 Swift 編譯器所提示的問題:(1) 必須建構器 init(beginPoint:endPoint:) 必須由 Line 的子類別所提供;(2) 覆寫的宣告必須有 override 關鍵字;以及 (3) 使用元類別的值來建構 Self 類別的物件時,必須使用必須建構器。以下是顯示這些錯誤訊息的圖像:

我將會做出必要的變更,並且以行內註解來解釋它們。以下是可以正常運作的 Line 子類別 DrawableLine:
class DrawableLine: Line
{

    var color: UIColor
    var width: CGFloat

    // We must implement this init tangentially because of Copyable.
    // The "'required' initializer 'init(beginPoint:endPoint:)' must
    // be provided by subclass of 'Line'" error is then resolved.
    // Think of this as a convenience constructor -- shorthand
    // for rapid prototyping.
    required init( beginPoint: CGPoint, endPoint: CGPoint ) {
        self.color = UIColor.black
        self.width = 1.0
        super.init( beginPoint: beginPoint, endPoint: endPoint )
    }

    // Prefxing this init with the "required" keyword resolves the
    // "Constructing an object of class type 'Self' with
    // a metatype value must use a 'required' initializer" error.
    required init( beginPoint: CGPoint, endPoint: CGPoint, color: UIColor, width: CGFloat )
    {
        self.color = color
        self.width = width
        super.init( beginPoint: beginPoint, endPoint: endPoint )
    }

    // Prefixing the method with the "override" keyword resolves the
    // "Overriding declaration requires an 'override' keyword" error.
    // We must provide a copy of DrawableLine, not Line.
    override func copy() -> Self
    {
        return type(of: self).init( beginPoint: beginPoint,
                                    endPoint: endPoint,
                                    color: color,
                                    width: width )
    }

} // end class DrawableLine
在 DrawableLine 之中實作 required init(beginPoint:endPoint:) 其實只需付出很小的代價,因為我們可以在未來每個 Line 的子類別中,持續創造合法的複製建構器。(這種做法比使用 init(copy: Self) 和繼承時衍生的副作用好得多了。)
關於 required 關鍵字,請記住,當一個類別採取了一個協定,就必須要遵循協定 ⋯⋯ 亦要記住類別可以擁有子類別(後代)。我再次向你推薦 Swift 文件中「必須建構器」部分的說明。
讓我測試一下 DrawableLine 的複製建構器,以確保變更實例的副本不會影響原本實例的屬性。請注意,雖然只是一個玩笑,但我註明了建構器為一個「便利建構器,一種用來快速建構原型的方式」。
let thinBlackLine = DrawableLine(beginPoint: CGPoint(x: 187.5, y: 40.0), endPoint: CGPoint(x: 187.5, y: 300.0))
let thinLineCopy = thinBlackLine.copy()
thinLineCopy.color = UIColor.red
thinBlackLine.color
// UIColor.black
thinBlackLine === thinLineCopy
// false
在 Playground 中畫出屬於自己的線條
讓我們在 playground 模擬器中畫出自己的 thinBlackLine!刪掉所有 playground 底部這行之後的樣板程式碼:
class MyViewController : UIViewController {...
用下列程式碼取而代之:
class LineDrawingView: UIView
{
    override func draw(_ rect: CGRect)
    {
        let currGraphicsContext = UIGraphicsGetCurrentContext()
        currGraphicsContext?.setLineWidth(thinBlackLine.width)
        currGraphicsContext?.setStrokeColor(thinBlackLine.color.cgColor)
        // "Begins a new subpath [e.g., line] at the specified point."
        currGraphicsContext?.move(to: thinBlackLine.beginPoint)
        // "Appends a straight line segment from the current point to the specified point."
        currGraphicsContext?.addLine(to: thinBlackLine.endPoint)
        // "Paints a line along the current path."
        currGraphicsContext?.strokePath()
        UIGraphicsEndImageContext()
    }
}

class MyViewController : UIViewController {
    override func loadView() {
        let view = LineDrawingView()
        view.backgroundColor = .white
        self.view = view
    }
}
// Present the view controller in the Live View window
PlaygroundPage.current.liveView = MyViewController()
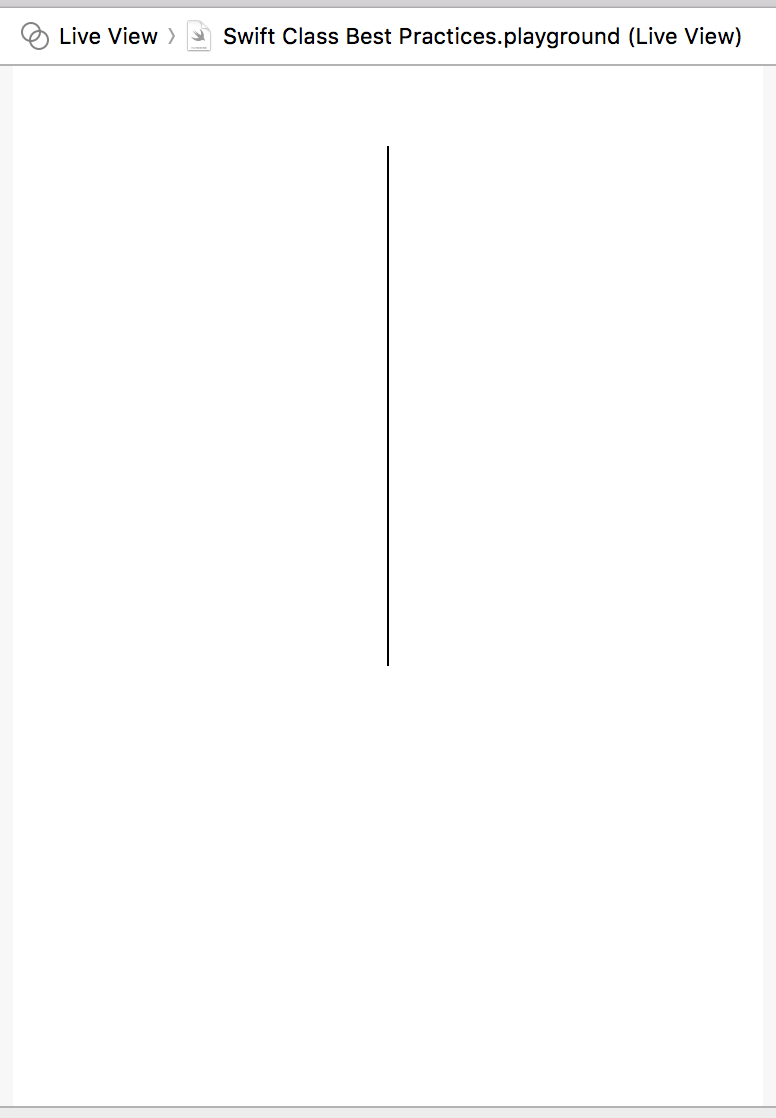
如果你還不懂如何在 playground 繪畫,可以參考這裡。執行 playground,你將會看到線條呈現在「Live View」視窗中:
指定建構器 (Designated Initializer)
請注意,我一直都在範例程式碼中使用指定建構器,因為我在心中已經掌握了「類別繼承及初始化」的概念。除非有特別原因,不然我會建議你多製作指定建構器。
每當解構類別的時候,我總是會考慮使用繼承之後擴展這些類別的可能性。首先,考慮一下:
初始化是一個準備一個類別、結構或列舉的實例作使用的過程,這過程牽涉到設定該實例所有儲存屬性的初始值,以及在新的實例準備好之前執行其它必須的初始化及設定過程。
有些開發者會將所有的類別成員列為可選型別 (Optional),以省略創造建構器的步驟。當然有時候將成員屬性列為可選型別是必要的,但我會盡量試著避免這種情況;在大多數情況下,我都能將我的類別成員設計成非可選型別屬性。Swift 的設計者瞭解擁有指定建構器能夠增加類別的可讀性、支援性、以及潛在擴展性,這使你和其他開發者更能洞悉你設計類別的目的和企圖。根據 Swift docs 的敘述:
指定建構器是一個類別最主要的建構器,它將一個類別中涵蓋的所有屬性完全初始化,並呼叫適當的父類別建構器來繼續完成一連串父類別鏈的初始化過程。
類別傾向擁有非常少的指定建構器,只擁有一個指定建構器也是很常見的情況。指定建構器是一個起始點,誘發初始化過程開始,並往父類別傳遞。
每個類別最少都要有一個指定建構器,在某些情況當中,從父類別繼承一個或多個指定建構器就能滿足這個條件 ⋯⋯
預設建構器 (Default Initializer)
我另一個定義類別的最佳實踐,就是一個簡單的協定:
protocol DefaultInitializable {

    init()

}
我們很明顯看到 DefaultInitializable 要求遵循類別以實現 init() 方法,你應該已經發現那其實就是預設建構器。
假設你的類別包含了所有可選型別屬性,卻沒有明確的預設值,同時你也沒有預設建構器。換句話說,你類別中的所有屬性在呼叫提供 Swift 的預設建構器後都會是 nil,你新的類別實例(物件)可能會讓你的 App 崩潰。我肯定無論何種情況,總會有人用下列這種方式來初始化類別:
class Line {

    var beginPoint: CGPoint?
    var endPoint: CGPoint?

}

let line = Line() // Line
line.beginPoint // nil
line.endPoint // nil
請記得 Swift 在這種情況會做甚麼事:
Swift 提供了一個適用於任何結構或類別的預設建構器,給予所有的屬性預設值,但不會提供建構器。預設建構器只是創建了一個新的實例,並為所有成員屬性設定預設值。
一個嚴謹的可選型別屬性是沒有預設值的,而且「就算沒有編寫特別指派的指令於程式碼中,可選屬性的成員也會自動獲得 nil 作為預設值」。
這樣一來,當開發者將上列程式碼中的 line 、 line.beginPoint 或是 line.endPoint,傳遞給一些沒有檢查 nil 的客製化程式碼,會發生什麼事呢?答案就是程式會崩潰。
所以,DefaultInitializable 協定要求你實作一個預設建構器 (init())。我希望你能夠仔細地將觀念釐清。在程式碼中,當你的類別形成物件時,所有的成員屬性都會獲得預設值。
我們會在下一節中看到 DefaultInitializable 的範例。我想向你展示在定義類別時,如何將眾多需要的協定組合在一起。
ARC 記憶體管理 (Memory Management)
在處理類別的時候,記憶體管理是由 ARC 所負責,而記憶體洩漏總是有可能會發生。雖然我提出的方法並不是像魔法般可以解決記憶體洩漏,但我試著幫助你追蹤記憶體洩漏,或者至少讓你瞭解到實例在記憶體層級是如何運作。以下是一個協定及其擴展,我希望你能夠發現它多麼有用:
protocol Allocatable: class {

    // Give a name to your instance.
    var tag: String { get }
    // Call in initializers.
    func onAllocate()
    // Call in deinitializers.
    func onDeallocate()

}

extension Allocatable {

    func onAllocate() {
        print("Instance \(tag) of type \(typeIs()) allocated.")
    }

    func typeIs() -> String {
        return String(describing: type(of: self))
    }

    func onDeallocate() {
        print("Instance \(tag) of type \(typeIs()) deallocated.")
    }

} // end extension Allocatable
tag 變數讓你可以辨識類別的獨立實例。我無法魔法般為你的類別產生一個預設建構器,也不能在協定中要求呼叫 deinit。因此,你必須配置自己的類別,以符合我的 Allocatable 協定要求。
在以下的程式碼中,我建構了一個父類別採納 DefaultInitializable 和 Allocatable 協定,當中包含了一些有用的行內註解,註解也提到了一些我們之前討論過並解決了的錯誤:
protocol Allocatable: class {

    // Give a name to your instance.
    var tag: String { get }
    // Call this in initializers.
    func onAllocate()
    // Call this in deinitializers.
    func onDeallocate()

}

extension Allocatable {

    func onAllocate() {
        print("Instance \(tag) of type \(typeIs()) allocated.")
    }

    func typeIs() -> String {
        return String(describing: type(of: self))
    }

    func onDeallocate() {
        print("Instance \(tag) of type \(typeIs()) deallocated.")
    }

} // end extension Allocatable

class Line: Allocatable, DefaultInitializable {

    var beginPoint: CGPoint
    var endPoint: CGPoint
    let tag: String

    // "Initializer requirement 'init()' can only be satisfied
    // by a 'required' initializer in non-final class 'Line'"
    // resolved with "required" prefix
    required init() {
        // Defines a straight vertical line in the upper, center
        // of an iPhone 8
        beginPoint = CGPoint( x: 187.5, y: 40.0 )
        endPoint = CGPoint( x: 187.5, y: 300.0 )
        tag = "Untagged"

        onAllocate()
    }

    init( beginPoint:CGPoint, endPoint:CGPoint, tag: String ) {

        self.beginPoint = CGPoint( x: beginPoint.x, y: beginPoint.y )
        self.endPoint = CGPoint( x: endPoint.x, y: endPoint.y )
        self.tag = tag

        onAllocate()
    }

    deinit {
        onDeallocate()
    }

} // end class Line

class DrawableLine: Line {

    var color: UIColor
    var width: CGFloat

    // "'required' modifier must be present on all overrides of a
    // required initializer" resolved with "required" prefix
    //
    // "Overriding declaration requires an 'override' keyword"
    // resolved when I marked parent init() as "required"
    required init() {
        color = UIColor.black
        width = 1.0

        super.init()
    }

    required init( beginPoint:CGPoint,
                   endPoint:CGPoint,
                   color: UIColor,
                   width: CGFloat,
                   tag: String ) {

        self.color = color
        self.width = width

        super.init( beginPoint: beginPoint, endPoint: endPoint, tag: tag )
    }

} // end class DrawableLine
在下一段程式碼中,你可以看到我的 DefaultInitializable 協定如何只使用預設建構器(看看 line 和 drawableLine3 ),來支持安全使用類別實例。這也展示了指定建構器如何允許我創造兩條完全自行設定的線 drawableLine1 和 drawableLine2:
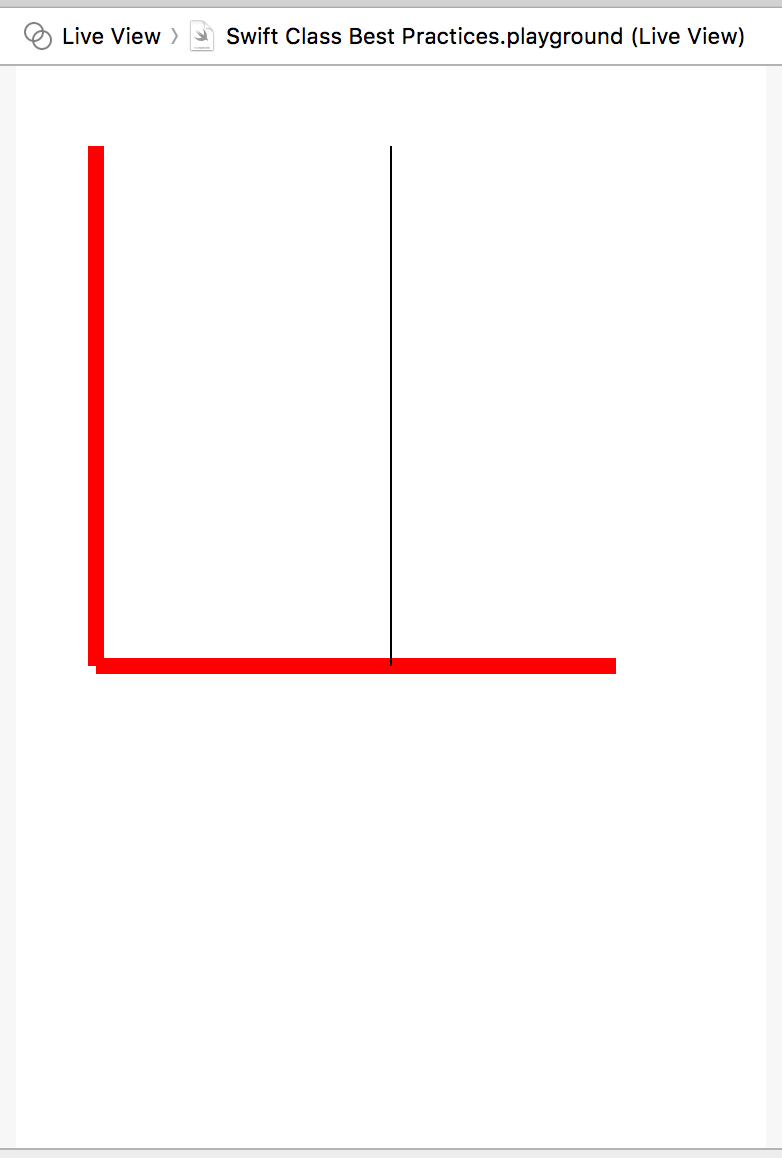
let line = Line()
let drawableLine1 = DrawableLine(beginPoint: CGPoint(x: 40.0, y: 40.0), endPoint: CGPoint(x: 40.0, y: 300.0), color: UIColor.red, width: 8.0, tag: "Line 1")
let drawableLine2 = DrawableLine(beginPoint: CGPoint(x: 40.0, y: 300.0), endPoint: CGPoint(x: 300.0, y: 300.0), color: UIColor.red, width: 8.0, tag: "Line 2")
let drawableLine3 = DrawableLine()
然後,我寫了一些程式碼來渲染 CGContext 中的線條⋯⋯
class LineDrawingView: UIView
{
    override func draw(_ rect: CGRect)
    {
        let currGraphicsContext = UIGraphicsGetCurrentContext()

        currGraphicsContext?.setLineWidth(drawableLine1.width)
        currGraphicsContext?.setStrokeColor(drawableLine1.color.cgColor)
        // "Begins a new subpath [e.g., line] at the specified point."
        currGraphicsContext?.move(to: drawableLine1.beginPoint)
        // "Appends a straight line segment from the current point to the specified point."
        currGraphicsContext?.addLine(to: drawableLine1.endPoint)
        // "Paints a line along the current path."
        currGraphicsContext?.strokePath()

        currGraphicsContext?.setLineWidth(drawableLine2.width)
        currGraphicsContext?.setStrokeColor(drawableLine2.color.cgColor)
        // "Begins a new subpath [e.g., line] at the specified point."
        currGraphicsContext?.move(to: drawableLine2.beginPoint)
        // "Appends a straight line segment from the current point to the specified point."
        currGraphicsContext?.addLine(to: drawableLine2.endPoint)
        // "Paints a line along the current path."
        currGraphicsContext?.strokePath()

        currGraphicsContext?.setLineWidth(drawableLine3.width)
        currGraphicsContext?.setStrokeColor(drawableLine3.color.cgColor)
        // "Begins a new subpath [e.g., line] at the specified point."
        currGraphicsContext?.move(to: drawableLine3.beginPoint)
        // "Appends a straight line segment from the current point to the specified point."
        currGraphicsContext?.addLine(to: drawableLine3.endPoint)
        // "Paints a line along the current path."
        currGraphicsContext?.strokePath()

        UIGraphicsEndImageContext()
    }
}

class MyViewController : UIViewController {
    override func loadView() {
        let view = LineDrawingView()
        view.backgroundColor = .white
        self.view = view
    }
}
// Present the view controller in the Live View window
PlaygroundPage.current.liveView = MyViewController()
⋯⋯ 並在模擬器當中顯示這些線條:
下列的範例程式碼將會展示在 Playground 中使用區域可視範圍時,如何讓 Allocatable 協定允許你追蹤 ARC 記憶體的配置與釋放:
do {
    let line = Line()
    let drawableLine1 = DrawableLine(beginPoint: CGPoint(x: 40.0, y: 40.0), endPoint: CGPoint(x: 40.0, y: 300.0), color: UIColor.red, width: 8.0, tag: "Line 1")
    let drawableLine2 = DrawableLine(beginPoint: CGPoint(x: 40.0, y: 300.0), endPoint: CGPoint(x: 300.0, y: 300.0), color: UIColor.red, width: 8.0, tag: "Line 2")
    let drawableLine3 = DrawableLine()
}
這裡是 playground 在終端機中的輸出:
Instance Untagged of type Line allocated.
Instance Line 1 of type DrawableLine allocated.
Instance Line 2 of type DrawableLine allocated.
Instance Untagged of type DrawableLine allocated.
Instance Untagged of type DrawableLine deallocated.
Instance Line 2 of type DrawableLine deallocated.
Instance Line 1 of type DrawableLine deallocated.
Instance Untagged of type Line deallocated.
遵循 Equatable 協定
你應該要有能用分辦同一類別兩個不同實例的屬性是否相同,你需要特別注意意外變異的可能性。
首先,請記住你總是可以使用「相等運算子 (identical operator) (===)」,來驗證同一類型不同的參考是否參照同一個實例(物件)。
但假設你已經使用複製建構器,來儲存你用來創建原有物件的標準值,而你稍後想要比較原有物件的值與標準值的差異。
或是考慮到你已經獲得許多不同的類別實例,而你需要有能力來比較它們屬性數值,以符合某些商業需求(例如:在一組人中找到姓氏匹配的人員)。在這個情況下,Equatable 就是一個必要的協定(工具)。如果你不記得關於 Equatable 的函意,可以參考我的解釋或是 Apple 的說明。
因此我加入了 Equatable 協定,使我的 Line 類別(原本已經遵循 Allocatable 和 DefaultInitializable 協定)必須遵循它。當我比較兩個 Line 類別的實例是否相等時,我盡量維持簡潔(注意到 Equatable 有提供 != 運算子)。我使用畢氏定理(參考這裡和這裡)來分辦並比較兩條線的長度。以下是新的 Line 類別的程式碼,由繼承 DrawableLine 而來:
class Line: Allocatable, DefaultInitializable, Equatable {

    var beginPoint: CGPoint
    var endPoint: CGPoint
    let tag: String

    // "Initializer requirement 'init()' can only be satisfied
    // by a 'required' initializer in non-final class 'Line'"
    // resolved with "required" prefix
    required init() {
        // Defines a straight vertical line in the upper, center
        // of an iPhone 8
        beginPoint = CGPoint( x: 187.5, y: 40.0 )
        endPoint = CGPoint( x: 187.5, y: 300.0 )
        tag = "Untagged"

        onAllocate()
    }

    init( beginPoint:CGPoint, endPoint:CGPoint, tag: String ) {

        self.beginPoint = CGPoint( x: beginPoint.x, y: beginPoint.y )
        self.endPoint = CGPoint( x: endPoint.x, y: endPoint.y )
        self.tag = tag

        onAllocate()
    }

    // The line length formula is based on the Pythagorean theorem.
    func length () -> CGFloat
    {
        let length = sqrt( pow(endPoint.x - beginPoint.x, 2) + pow(endPoint.y - beginPoint.y, 2) )
        return length
    }

    static func == ( lhs: Line, rhs: Line ) -> Bool {
        return (lhs.length() == rhs.length())
    }

    deinit {
        onDeallocate()
    }

} // end class Line
以下是一些用來測試 Equatable 協定的程式碼,我亦將 Playground 右側視窗的輸出複製到每行程式碼旁邊:
drawableLine1 == drawableLine3 // true
drawableLine1 != drawableLine3 // false
drawableLine1 == drawableLine2 // true
看看上面的結果、和在前一段程式碼中建構器所使用的數值,來比較並驗證線條的長度和結果。
結論
不管你正在使用哪一種設計方法,你都需要擁有一系列的最佳實踐。得到好的工具並不代表一切,你仍然有可能把事情搞砸。一個成功的開發者就是靠學習並反覆練習,來瞭解像是 OOP 這樣的技術。你必須承認自己的錯誤,並願意從錯誤中學習,而且願意聽從前輩或朋輩的意見,並採納最佳實踐。
我在上文利用了不同的建構器來展示了一些使用類別的最佳實踐,例如複製建構器、預設建構器、指定建構器、解構器以及遵循 Equatable 協定等。這些不算十分艱難,我還沒有討論到可失敗建構器 (failable initializers) (init?()) 的議題,畢竟一篇文章無法涵蓋所有內容。我希望這些內容可以幫助你,至少試著去使用它們,你會發現大量關於 OOP 的建議,就算像是 Swift 這樣相對新的語言也是如此。
踏出你的第一步!去實驗、練習、研究,並做到最好!