
通知在 iOS 是個讓人又愛又恨的功能。因為通知,我們按三餐收到情人的甜言蜜語。也因為通知,害我們凌晨三點收到情敵的恐怖訊息。接下來就讓我們結合 iOS 10 最新的 UserNotifications framework,實現散播幸福散播愛的米花兒通知。
徵求使用者同意,獲得發送通知的權限
收到心上人的通知很開心,收到不是人的通知卻很恐怖。Apple 特別重視別讓使用者不開心,唯有徵求使用者同意後,App 才擁有發送通知的權力。明人不做暗事,我們就在 App 啟動時徵求使用者同意吧。
加入 UserNotifications Framework
import UserNotifications
在 iOS 10,通知相關功能定義在 UserNotifications framework ,所以我們必須先將它 import。請將以上程式碼加進AppDelegate.swift。
徵求使用者同意
之後,修改 AppDelegate 的 application(_:didFinishLaunchingWithOptions:),詢問使用者是否願意收到來自米花兒的幸福通知:
func application(_ application: UIApplication, didFinishLaunchingWithOptions launchOptions: [UIApplicationLaunchOptionsKey: Any]?) -> Bool {
        // Override point for customization after application launch.

        UNUserNotificationCenter.current().requestAuthorization(options: [.alert, .sound, .badge], completionHandler: { granted, error in
            if granted {
                print("使用者同意了,每天都能收到來自米花兒的幸福訊息")
            }
            else {
                print("使用者不同意,不喜歡米花兒,哭哭!")
            }

        })

        return true
}
UNUserNotificationCenter 物件是通知中心,幫我們打點推知相關的大小事。我們利用 UNUserNotificationCenter.current() 取得 UNUserNotificationCenter 物件,然後再呼叫它的 requestAuthorization(options:completionHandler:),徵求使用者同意 App 發送通知。此 function 的宣告如下:
open func requestAuthorization(options: UNAuthorizationOptions = [], completionHandler: @escaping (Bool, Error?) -> Swift.Void)
參數說明:
options:設定我們希望使用者同意的通知樣式。它的型別為 UNAuthorizationOptions,定義如下:
public struct UNAuthorizationOptions : OptionSet {

    public init(rawValue: UInt)

    public static var badge: UNAuthorizationOptions { get }
    public static var sound: UNAuthorizationOptions { get }
    public static var alert: UNAuthorizationOptions { get }
    public static var carPlay: UNAuthorizationOptions { get }
}
米花兒的幸福通知同時包含感人的圖文(alert),好聽的聲音(sound),以及在 App Icon 顯示數字(badge),提醒使用者有新的通知。因此我們傳入 [.alert, .sound, .badge]。
completionHandler: 在使用者開心同意或狠心拒絕我們時執行,我們傳入 closure,將 closure 的參數取名為 granted 和 error。Bool 型別的 granted 告訴我們使用者是否同意,若有錯誤則可從 Error 型別的 error 了解錯誤原因。
試一試執行程式
打開 App 後,迫不及待地跳出徵求同意的詢問訊息。
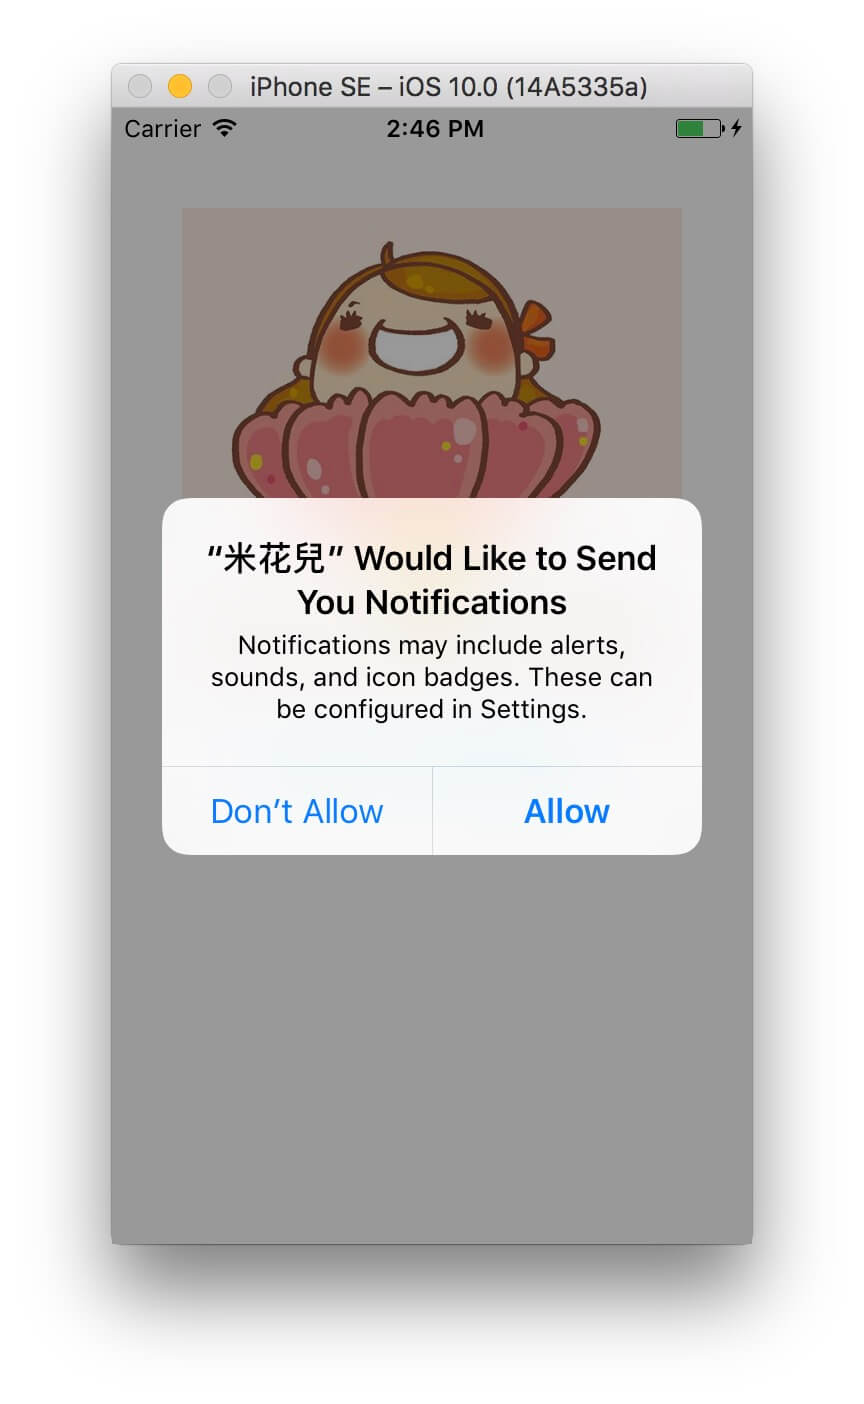
值得注意的,詢問訊息只會出現一次。當我們下次啟動 App 時,再也看不到它。如果使用者不小心按到 Don’t Allow,App 不能再死纏爛打地跳出詢問訊息,就好像真實世界裡,跟心儀對象表白被拒絕後,就應該安靜地走開一樣。不過使用者如果突然良心發現,想要同意接收 App 的通知倒是可以的,只要他從設定 App 進入 App 的通知設定頁面,打開 Allow Notifications 的開關。

發送散播幸福散播愛的米花兒通知
首先,在 ViewController.swift 加入 UserNotifications framework。
import UserNotifications
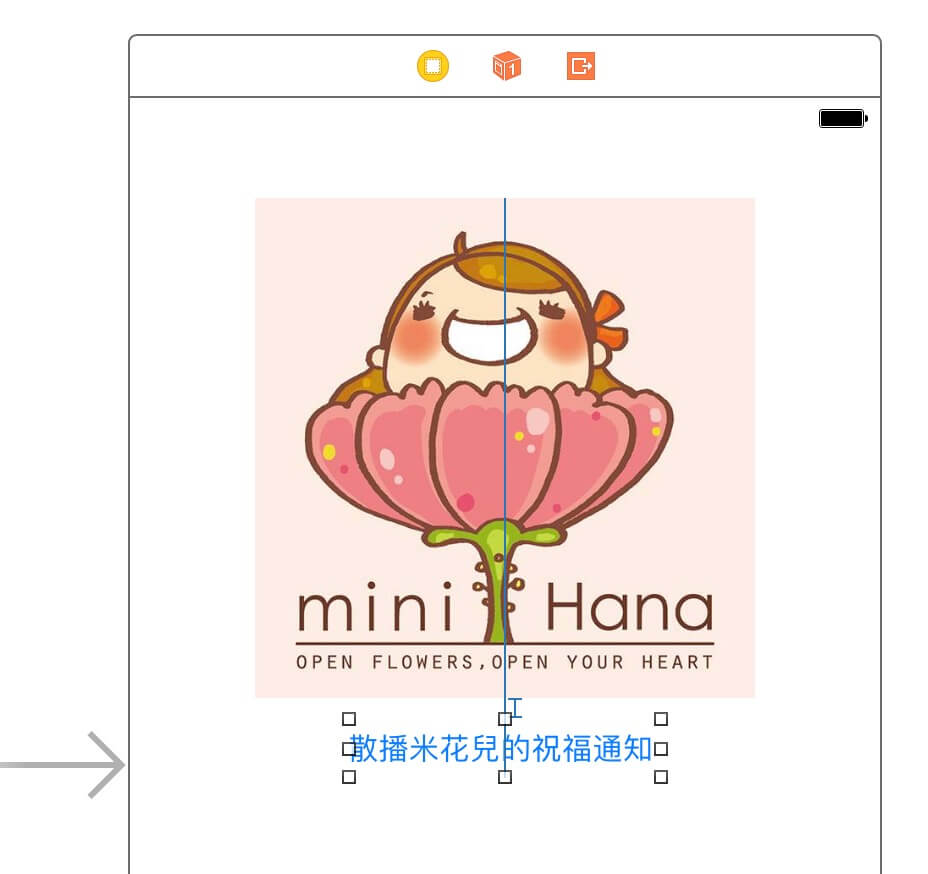
之後,設定點擊按鈕「散播米花兒的祝福通知」,觸發 ViewController 的 createNotification(_:)。
將createNotification(_:)更新如下:
@IBAction func createNotification(_ sender: AnyObject) {

        let content = UNMutableNotificationContent()
        content.title = "體驗過了,才是你的。"
        content.subtitle = "米花兒"
        content.body = "不要追問為什麼,就笨拙地走入未知。感受眼前的怦然與顫抖,聽聽左邊的碎裂和跳動。不管好的壞的,只有體驗過了,才是你的。"
        content.badge = 1
        content.sound = UNNotificationSound.default()

        let trigger = UNTimeIntervalNotificationTrigger(timeInterval: 10, repeats: false)
        let request = UNNotificationRequest(identifier: "notification1", content: content, trigger: trigger)
        UNUserNotificationCenter.current().add(request, withCompletionHandler: nil)
}
先試一試,之後再解說
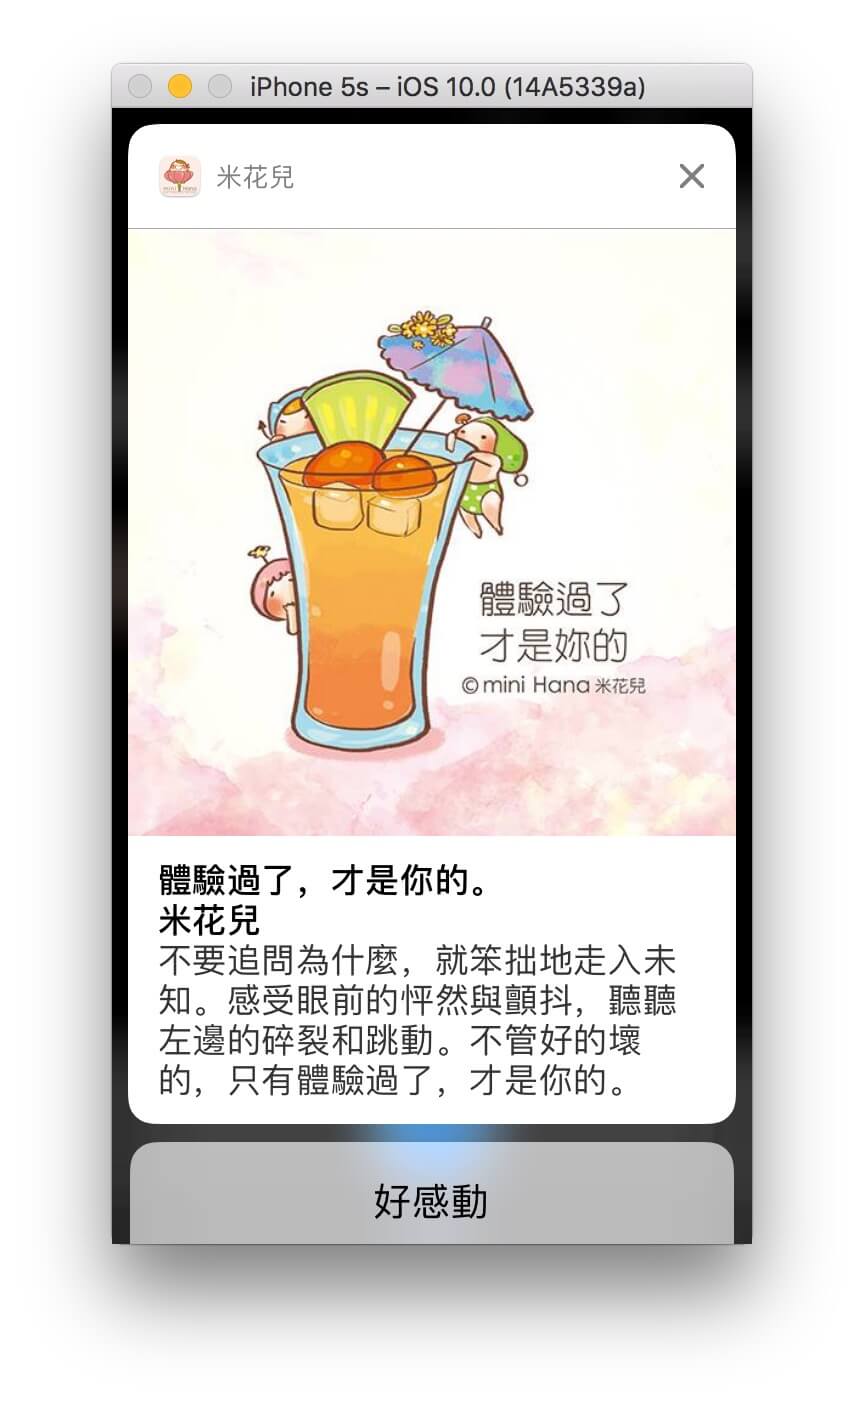
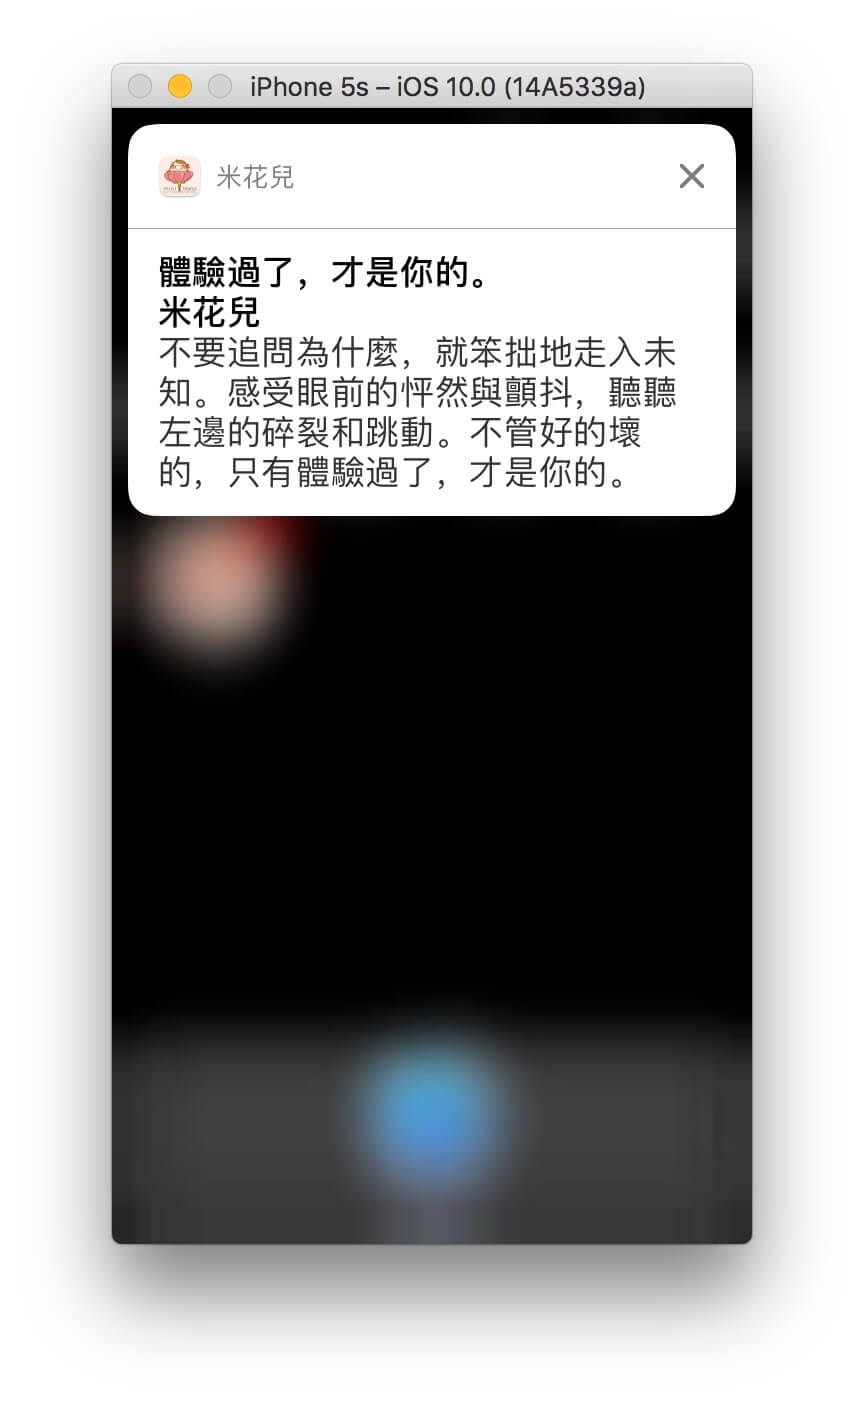
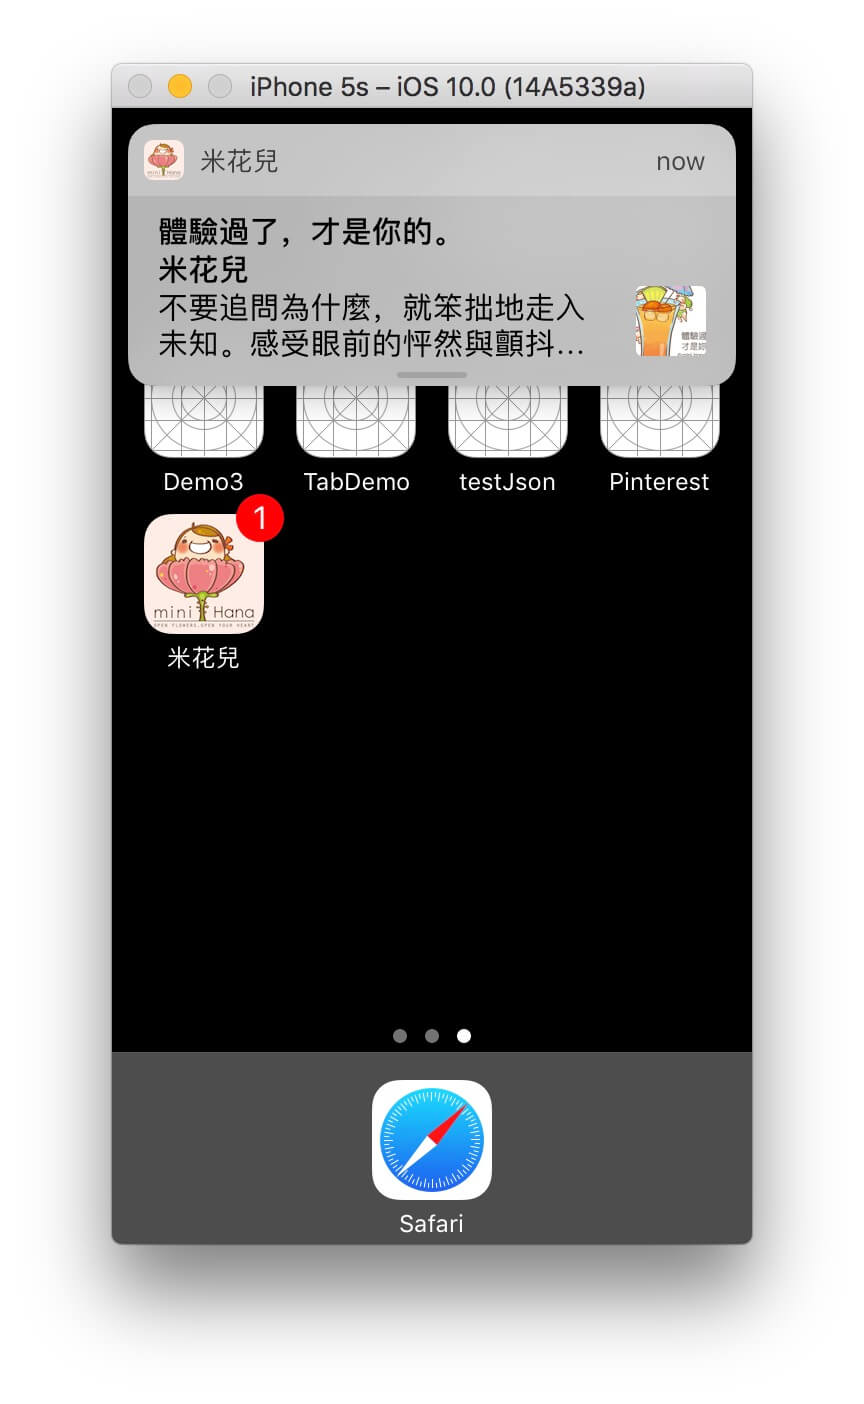
要測試的話,先按「散播米花兒的祝福通知」按鈕,然後跳到Home畫面(command+shift+h)或Lock(command+L)畫面。如無意外,你會見到米花兒的祝福通知。
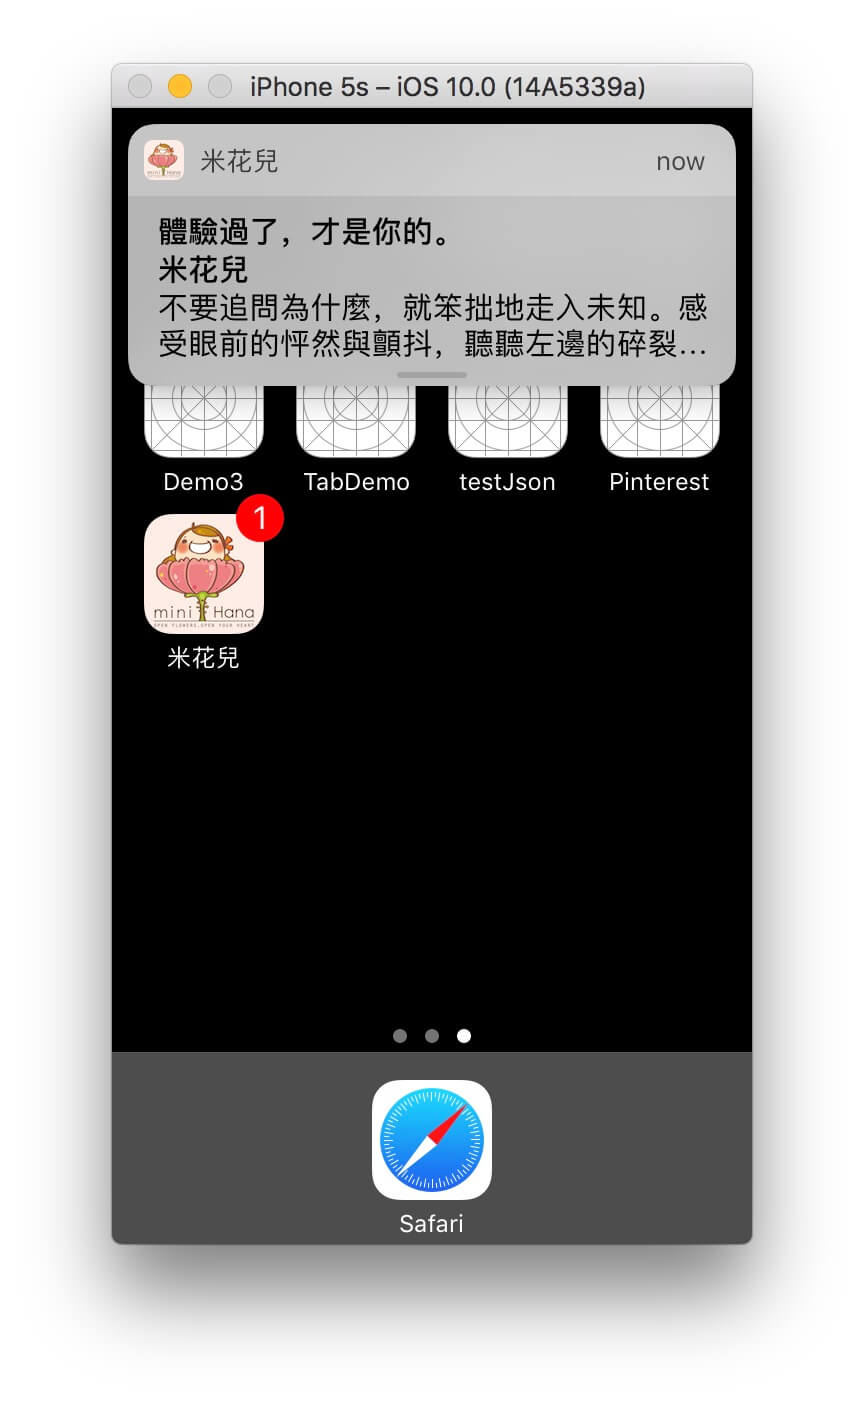
通知內容的 body 欄位文字太多,變成 … 了,怎麼辦呢 ? 別擔心,只要動動你的小指,將通知往下拖曳,即可展開顯示完整的內容。
createNotification 細部解說
好!現在就讓我們看看createNotification的内容:
(1) 建立 UNMutableNotificationContent 物件 content,設定感人肺腑的通知內容。
(2) 設定 title,subtitle 和 body 欄位,對應通知顯示的文字內容。值得注意的,想看到通知,一定要設定 body,只設定 title 和 subtitle 的話,就算你再等一百年也看不到它。
(3) badge 欄位設定 App Icon 顯示的數字。
(4) sound 欄位設定通知發出的聲音,型別為 UNNotificationSound。若無指定將成為無聲通知。為了提醒使用者米花兒幸福通知的來到,我們將聲音指定為 UNNotificationSound.default(),發出預設的通知聲。倘若想指定聲音也很簡單,只要先將音檔加到專案裡,然後指定檔名即可建立 UNNotificationSound 物件,例如以下例子。( 不過音檔這部分比較龜毛,一定得是 aiff,wav 或 caf,而且長度不能超過 30 秒。)
content.sound = UNNotificationSound(named: "小幸運")
(5) 建立 UNTimeIntervalNotificationTrigger 物件 trigger,設定通知觸發的條件。經由 UNTimeIntervalNotificationTrigger 物件,我們可設定幾秒鐘之後觸發通知,參數 timeInterval 設定秒數,repeats 設定是否重覆。
如果不喜歡對方,想吵到對方發瘋,可以試試將 timeInterval 設 10,repeats 設 true,每 10 秒鐘生成一則通知。
let trigger = UNTimeIntervalNotificationTrigger(timeInterval: 10, repeats: true)
可惜,Apple 早已想到這點,怕有人心懷不軌。當我們設定小於 60 秒觸發的重覆通知時,馬上會得到報應,App 立即閃退 ! Console 顯示以下錯誤訊息 :
2016-08-16 17:20:53.713 NotificationDemo[14959:707417] *** Terminating app due to uncaught exception NSInternalInconsistencyException, reason: 'time interval must be at least 60 if repeating'
其實總共有四種方法可以觸發通知,UNTimeIntervalNotificationTrigger 只不過是其中一種,有興趣的朋友可進一步研究以下幾種不同的方法 :
UNTimeIntervalNotificationTrigger: 幾秒鐘後觸發。-
UNCalendarNotificationTrigger: 指定某個時刻觸發。(相關程式碼連結) -
UNLocationNotificationTrigger: 使用者靠近某個位置時觸發。比方當你靠近彼得潘家時,手機馬上會收到通知,提醒你找彼得潘喝下午茶。 -
UNPushNotificationTrigger: 從千里之外的後台傳送到使用者手機的通知,比方彼得潘失戀時緊急發送給大家的討拍拍通知。
(6) 建立 UNNotificationRequest 物件 request。有了它,我們才能跟通知中心請求發送通知,其宣告如下:
public convenience init(identifier: String, content: UNNotificationContent, trigger: UNNotificationTrigger?)
建立 request 時,我們傳入剛剛生成的 content 和 trigger,如此通知中心才能明白通知的內容和觸發的條件。參數 identifier 設定 request 的 id。如果未來我們反悔,想取消原本請求的通知,則可透過此 identifier 取消 request。人生總是時常在反悔的朋友可先記一下以下幾種來自 UNUserNotificationCenter,取消 request 的方法。
open func removePendingNotificationRequests(withIdentifiers identifiers: [String])
open func removeAllPendingNotificationRequests()
open func removeDeliveredNotifications(withIdentifiers identifiers: [String])
open func removeAllDeliveredNotifications()
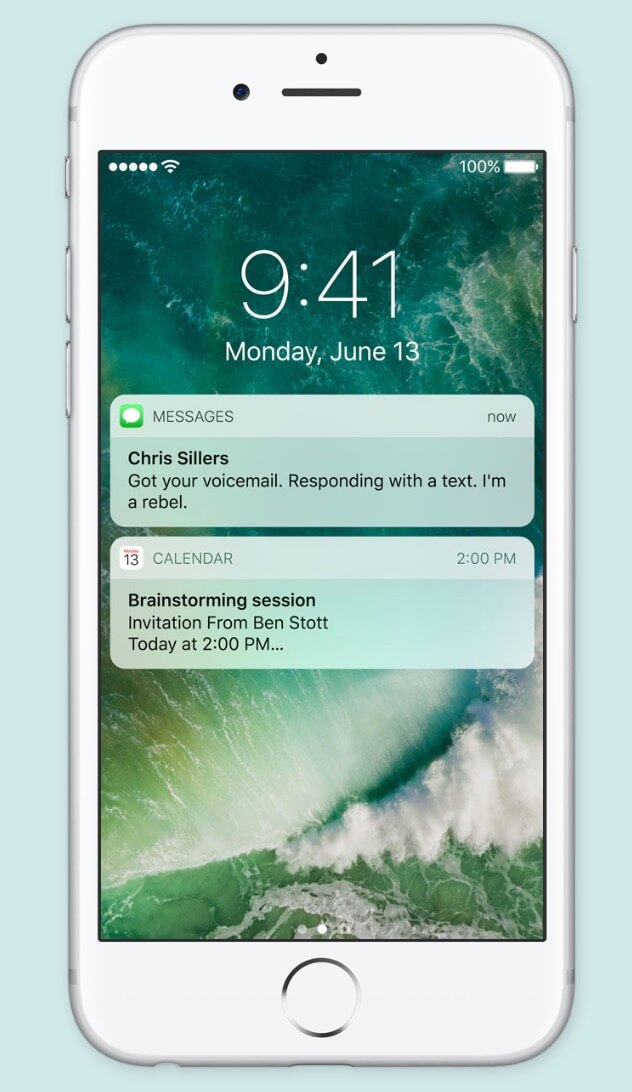
Pending 是使用者還沒收到的未來通知,Delivered 則是已經收到,但還顯示在通知頁面,還未點開觀看的通知,例如以下的圖片。(其實就是令人難過的已讀不回啦。)
(7) 呼叫 UNUserNotificationCenter 物件的 add(_:withCompletionHandler:),傳入 request,跟通知中心請求發送通知。function 的宣告如下:
public func add(_ request: UNNotificationRequest, withCompletionHandler completionHandler: ((Error?) -> Swift.Void)? = nil)
到時候系統將呼叫 completionHandler 參數,經由它的 Error 型別參數告訴我們通知請求是否被接受。因此我們可在 completionHandler 傳入 closure,判斷請求是否成功。不過在此我們不管結果,傳入 nil。就好像電影那些年柯騰跟沈佳宜表白時,請對方不要現在告訴他結果 :
柯騰: 拜託不要現在告訴我。請讓我,繼續喜歡妳。
– 電影那些年的經典台詞
在通知加入圖片,音樂,影片
通知裡只有文字未免單調,在這個年代,大家的胃口都被養大了,最好能搭配一些圖片影音,勾引誘惑使用者。透過 UNNotificationAttachment 物件,想加入這些內容可說是輕而易舉! 接下來就讓我們瞧瞧如何加入米花兒精心繪製的插畫圖片。
先將以下程式碼加入 createNotification 方法並插在 trigger 變數之前:
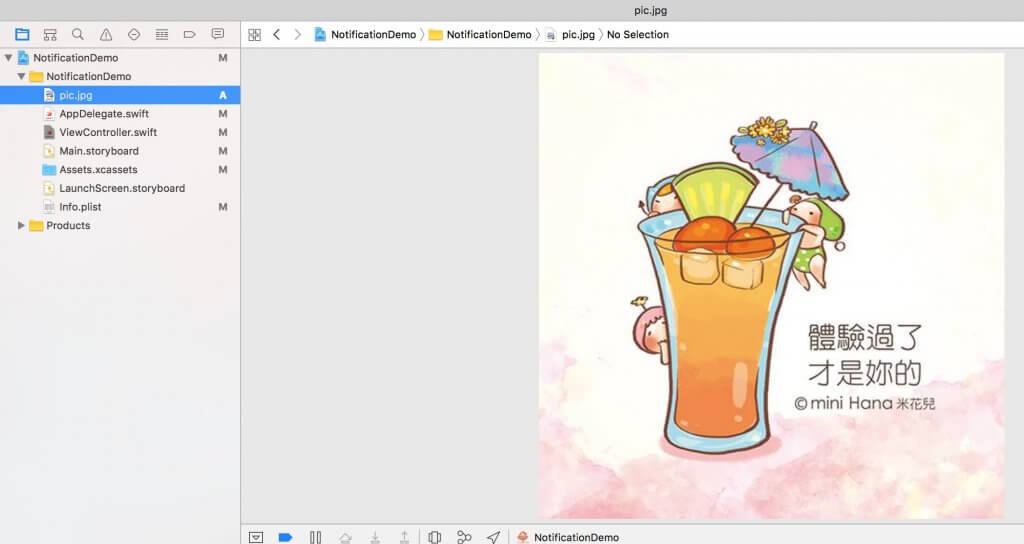
let imageURL = Bundle.main.url(forResource: "pic", withExtension: "jpg")
let attachment = try! UNNotificationAttachment(identifier: "", url: imageURL!, options: nil)
content.attachments = [attachment]
生成 UNNotificationAttachment 物件
我們先取得圖片的 url,然後再生成 UNNotificationAttachment 物件。UNNotificationAttachment 的 init 宣告如下:
public convenience init(identifier: String, url URL: URL, options: [AnyHashable : Any]? = nil) throws
UNNotificationAttachment 物件的內容可以是圖片,音樂或影片,只要我們傳給它檔案的路徑 url。值得注意的,由於需要傳入 url,所以圖片一定要加到 project navigator 的清單裡,不能放在 Assets.xcassets,因為我們無法取得裡頭圖片的 url。
生成 UNNotificationAttachment 物件還需要其它 2 個參數,identifier 設定物件的 id,懶得想也可以給空字串,系統會自動幫我們生成一組 id。options 參數可做一些進階的設定,有興趣的讀者可進一步查詢 Attachment Attributes 的相關說明。
設定 UNMutableNotificationContent 物件 的 attachments 屬性
UNMutableNotificationContent 物件的屬性 attachments 設定通知包含的圖片影音。它是個可包含多個 UNNotificationAttachment 物件的 array。做人不要太貪心,在此我們先傳入剛剛生成的 attachment 就好。
執行結果
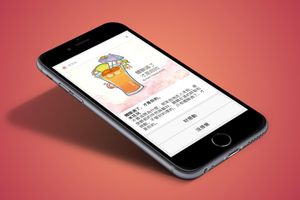
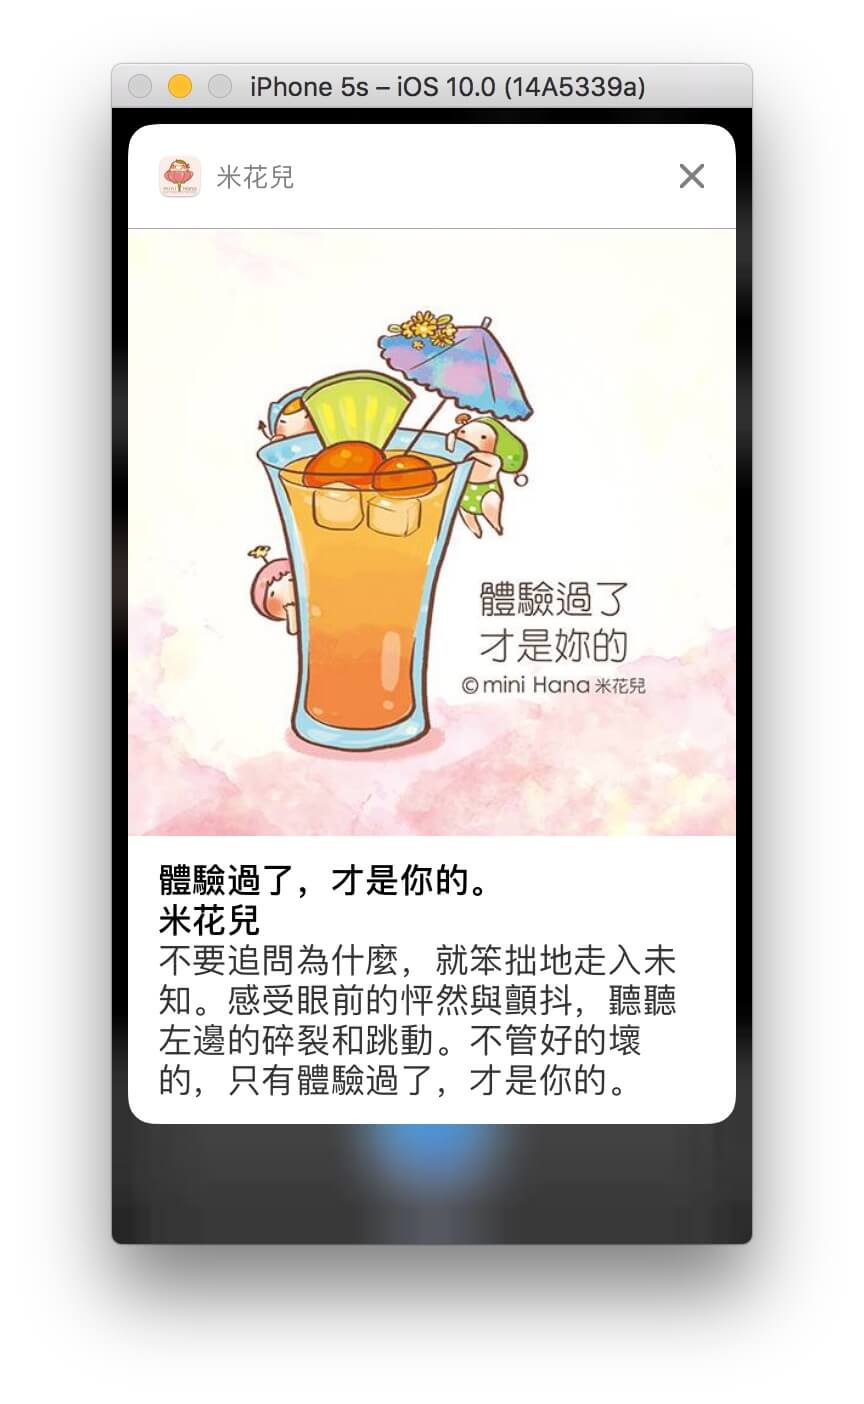
米花兒的插畫,「體驗過了,才是你的」完美地在通知框框裡現身。可惜由於框框太小,只能顯示正方形的部分截圖。
想看完整版嗎?很簡單,只要一樣地以小指將通知往下拖曳,即可展開顯示完整的圖片。
在前景顯示通知
通知的設計是為了讓使用者在操作其它 App 或是發呆做著白日夢時,貼心提醒使用者有大事發生。(好吧,也可能只是小事。) 因此當 App 在前景時,預設是不會顯示通知訊息的。 Apple 的設計很合理,畢竟使用者正在使用 App ,沒必要畫蛇添足跳出通知。
不過有些時候就算 App 在前景,還是有顯示通知的需求。比方說,當彼得潘在 FB 的 Messenger App 跟一輩子的coding聊天時,朋友 Chilam Lin 突然很想彼得潘,傳來我好想你的訊息。如此重要的訊息當然要馬上回覆,所以 Messenger App 不敢怠惰,立即在 App 畫面的上方顯示通知內容。
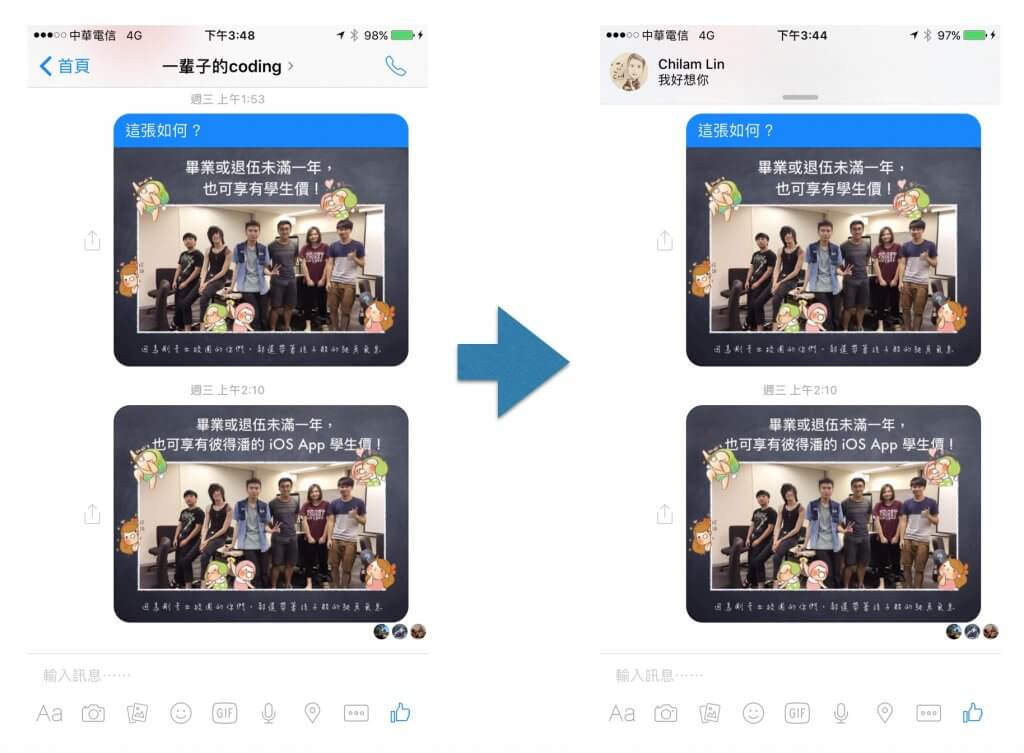
Messenger App 之所以能在前景顯示推播,並不是天上掉下來的,它千辛萬苦地設計製作長方形的通知圖示,將其顯示在畫面上。不過在 iOS 10 SDK,終於不用那麼辛苦了。如果只想顯示標準的通知樣式,現在只要進行以下步驟即可實現。
遵從 UNUserNotificationCenterDelegate Protocol
我們利用 extension 擴充 AppDelegate,讓它遵從 UNUserNotificationCenterDelegate 協定並定義 userNotificationCenter(_:willPresent:withCompletionHandler:)。將以下程式碼加入 AppDelegate.swift:
extension AppDelegate: UNUserNotificationCenterDelegate {

    func userNotificationCenter(_ center: UNUserNotificationCenter, willPresent notification: UNNotification, withCompletionHandler completionHandler: @escaping (UNNotificationPresentationOptions) -> Void) {
        completionHandler([.badge, .sound, .alert])
    }
}
待會我們會把 AppDelegate 物件設為 UNUserNotificationCenter 物件的代理人,如此當 App 在前景收到通知時, UNUserNotificationCenter 物件將請代理人執行此 function,只要在 function 裡呼叫 completionHandler,即可顯示通知。completionHandler 的參數的型別為 UNNotificationPresentationOptions,其宣告如下:
public struct UNNotificationPresentationOptions : OptionSet {

    public init(rawValue: UInt)

    public static var badge: UNNotificationPresentationOptions { get }
    public static var sound: UNNotificationPresentationOptions { get }
    public static var alert: UNNotificationPresentationOptions { get }
}
completionHandler 的參數設定通知如何呈現,在此我們貪心地傳入 [.badge, .sound, .alert],表示我們想同時顯示通知,發出聲音,以及更新 App Icon 上的數字。
將 AppDelegate 物件設為 UNUserNotificationCenter 物件的代理人
將此行程式碼加在 application(_:didFinishLaunchingWithOptions:) 裡:
UNUserNotificationCenter.current().delegate = self
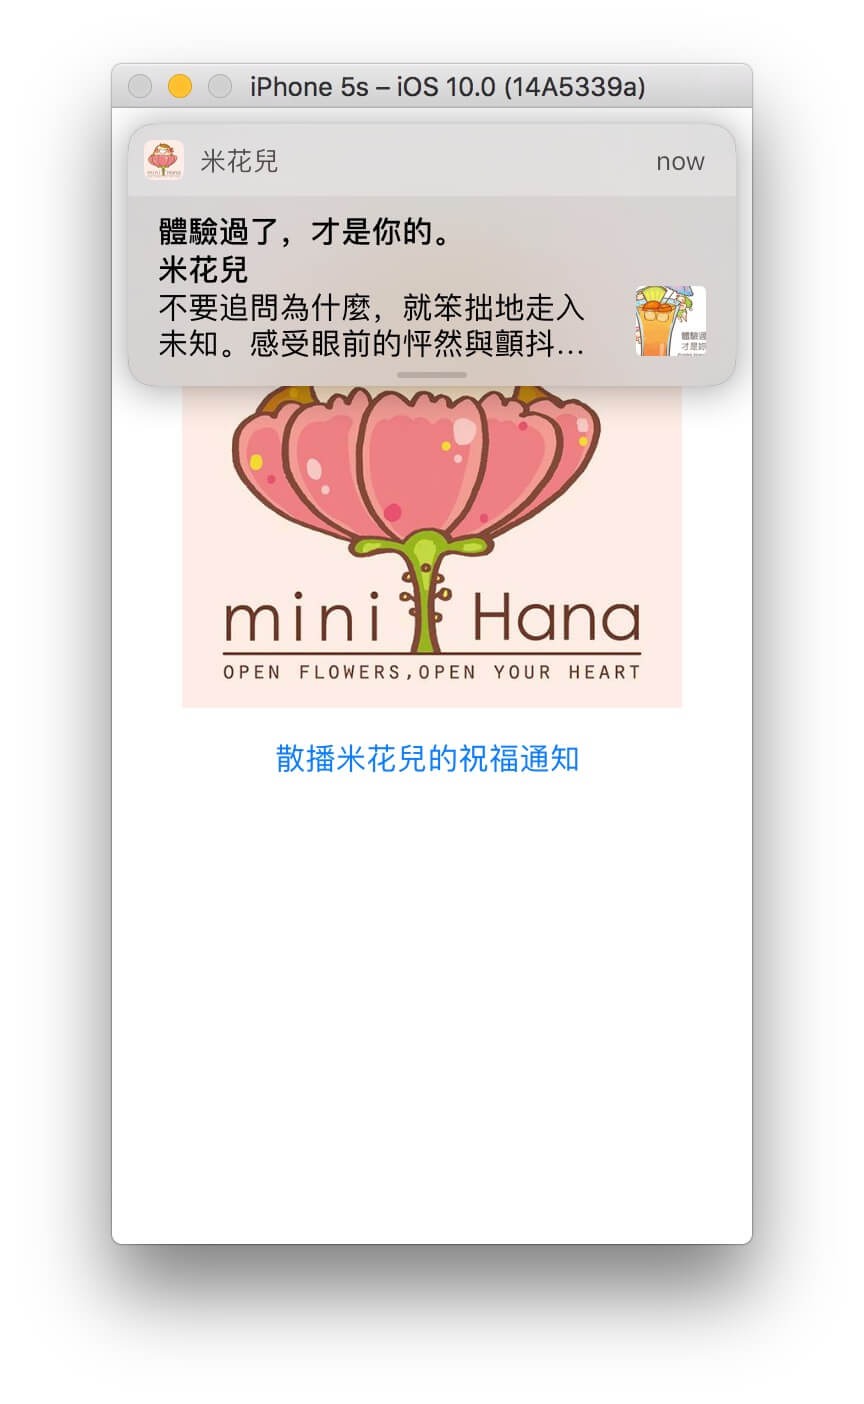
執行結果
試試發一個米花兒的祝福通知,稍等 10 秒鐘,即可在前景看到通知。
馬上傳送通知
學會在前景顯示通知後,還可搭配馬上傳送通知的密技。比方當使用者點選按鈕「顯示今日祝福通知」,馬上在畫面上顯示通知。要知道 iOS App 開發者都是一秒鐘幾十萬上下,可沒那美國時間等待。此密技十分容易,只要在生成 UNNotificationRequest 物件時,trigger 參數傳入 nil 即可。
let request = UNNotificationRequest(identifier: "notification1", content: content, trigger: nil)
在通知裡包含客製化的資訊,判斷使用者點選通知。
當使用者點選通知時,App 會自動被啟動或從背景回到前景。可是有些時候我們想帶給使用者更好的體驗,比方有懼高症的虎克船長傳 LINE 訊息約彼得潘二樓陽台對決時,點開通知後, LINE App 會馬上跳到彼得潘和虎克船長的私密聊天室。想實現如此貼心的功能,App 必須能做到以下三件事 :
- 發送通知時,在通知裡包含客製化的資訊。
-
判斷使用者點選通知。
-
從收到的通知裡解析客製化的資訊,進行相對應的動作,比方像 LINE App 一樣,解析訊息來自虎克船長,切換到虎克船長的聊天室。
發送通知時,在通知裡包含客製化資訊
在 ViewController.swift,修改 createNotification(_:),設定 content 的屬性 userInfo。它的型別是 Dictionary,因此我們可在其中搭配自訂的 key ,包含任何我們想攜帶的客製化資訊。在此我們傳入和通知內容相關的米花兒粉絲團文章網址。
content.userInfo = ["link":"https://www.facebook.com/himinihana/photos/a.104501733005072.5463.100117360110176/981809495274287"]
判斷使用者點擊通知,解析通知內容
不管 App 在前景還是背景,不管 App 是生是死,不管使用者直接點擊通知還是先把通知拖曳展開後再點擊,UNUserNotificationCenterDelegate 宣告的 userNotificationCenter(_:didReceive:withCompletionHandler:) 都會被觸發。因此我們在 UNUserNotificationCenter 物件的代理人類別 AppDelegate 裡定義此 function,即可客製化使用者點擊通知後做的事情。
將程式碼加入 AppDelegate 的 extension 內:
func userNotificationCenter(_ center: UNUserNotificationCenter, didReceive response: UNNotificationResponse, withCompletionHandler completionHandler:  @escaping () -> Void) {

        let content = response.notification.request.content
        print("title \(content.title)")
        print("userInfo \(content.userInfo)")

        completionHandler()
}
若要解析通知的內容,必須透過參數 response,從 response.notification.request.content 挖掘出我們真正關心的通知內容,UNNotificationContent 物件,客製化的資訊正包含在它的 userInfo 裡。
為通知增添客製化的按鈕
通知預設的動作只有兩種,要嘛點擊通知打開 App,要嘛關掉通知。其實通知能做的不只這些,就像歌詞唱的,「你從不知道,我想做的不只是朋友」。接下來我們將為通知加入客製化的按鈕,當使用者收到米花兒的通知時,可依自己的喜好,喜歡選擇「好感動」,不喜歡選擇「沒感覺」。
加入客製化的按鈕,設定自訂的通知類別
修改 AppDelegate 的 application(_:didFinishLaunchingWithOptions:),於其中加入以下程式碼。
let likeAction = UNNotificationAction(identifier: "like", title: "好感動", options: [.foreground])
let dislikeAction = UNNotificationAction(identifier: "dislike", title: "沒感覺", options: [])
let category = UNNotificationCategory(identifier: "luckyMessage", actions: [likeAction, dislikeAction], intentIdentifiers: [], options: [])
UNUserNotificationCenter.current().setNotificationCategories([category])
讓我為以上程式進行細部解說:
(1) 生成對應到通知按鈕的 UNNotificationAction 物件 – 在此我們生成 likeAction 和 dislikeAction,即可在通知上顯示兩個按鈕。UNNotificationAction 的 init 宣告如下 :
public convenience init(identifier: String, title: String, options: UNNotificationActionOptions = [])
參數說明:
identifier: 之後可經由此處設定的 ID 判斷使用者點選的按鈕。
title: 按鈕顯示的文字。
options: 設定按鈕點選後的動作。其型別為 UNNotificationActionOptions,定義如下:
public struct UNNotificationActionOptions : OptionSet {

    public init(rawValue: UInt)

    // Whether this action should require unlocking before being performed.
    public static var authenticationRequired: UNNotificationActionOptions { get }

    // Whether this action should be indicated as destructive.
    public static var destructive: UNNotificationActionOptions { get }

    // Whether this action should cause the application to launch in the foreground.
    public static var foreground: UNNotificationActionOptions { get }
}
在 likeAction 我們傳入 [.foreground],表示點選後將打開 App。而 dislikeAction 傳入 [] 則會關閉推播,不打開 App。既然不喜歡了,最好就不相見吧。
(2) 跟通知中心註冊包含客製按鈕的特別通知 – 生成 UNNotificationCategory 物件,將它設為 UNUserNotificationCenter 物件的 NotificationCategories。 UNNotificationCategory 物件定義了 App 支援的特別通知。這裡的重點在它的 identifier 和 actions。到時候 App 收到通知時,將比對通知內容的 categoryIdentifier 找尋對應的特別通知,而特別通知顯示的按鈕即由當初傳入的 actions 決定。至於另外兩個參數 intentIdentifiers 和 options 則屬較進階的設定,可暫且忽略,先傳入 [] 即可。
因此,一個 App 其實可支援多種不同按鈕的通知,只要呼叫 setNotificationCategories 傳入包含多個 UNNotificationCategory 物件的 array,每個指定不同的 id 和 actions。
設定通知內容的類別 ID
回到 ViewController.swift,修改 createNotification(_:)並加入以下程式碼:
content.categoryIdentifier = "luckyMessage"
我們設定 content 的 categoryIdentifier 為 luckyMessage,和剛剛 UNNotificationCategory 物件的 identifier 一樣,如此到時候 App 收到通知時,才知道要顯示好感動和沒感覺的按鈕。倘若沒有設定 categoryIdentifier,或是設定的 categoryIdentifier 找不到對應的 UNNotificationCategory,則會顯示只有關閉按鈕的標準通知。
判斷使用者點選通知的哪一個按鈕
要判斷使用者點選哪一個按鈕,可以修改 userNotificationCenter(_:didReceive:withCompletionHandler:),加入以下程式碼,從 response.actionIdentifier 判斷使用者點選哪一個按鈕。
print("actionIdentifier \(response.actionIdentifier)")
如果是客製化按鈕,.actionIdentifier 將為當初 UNNotificationAction 物件的 identifier。
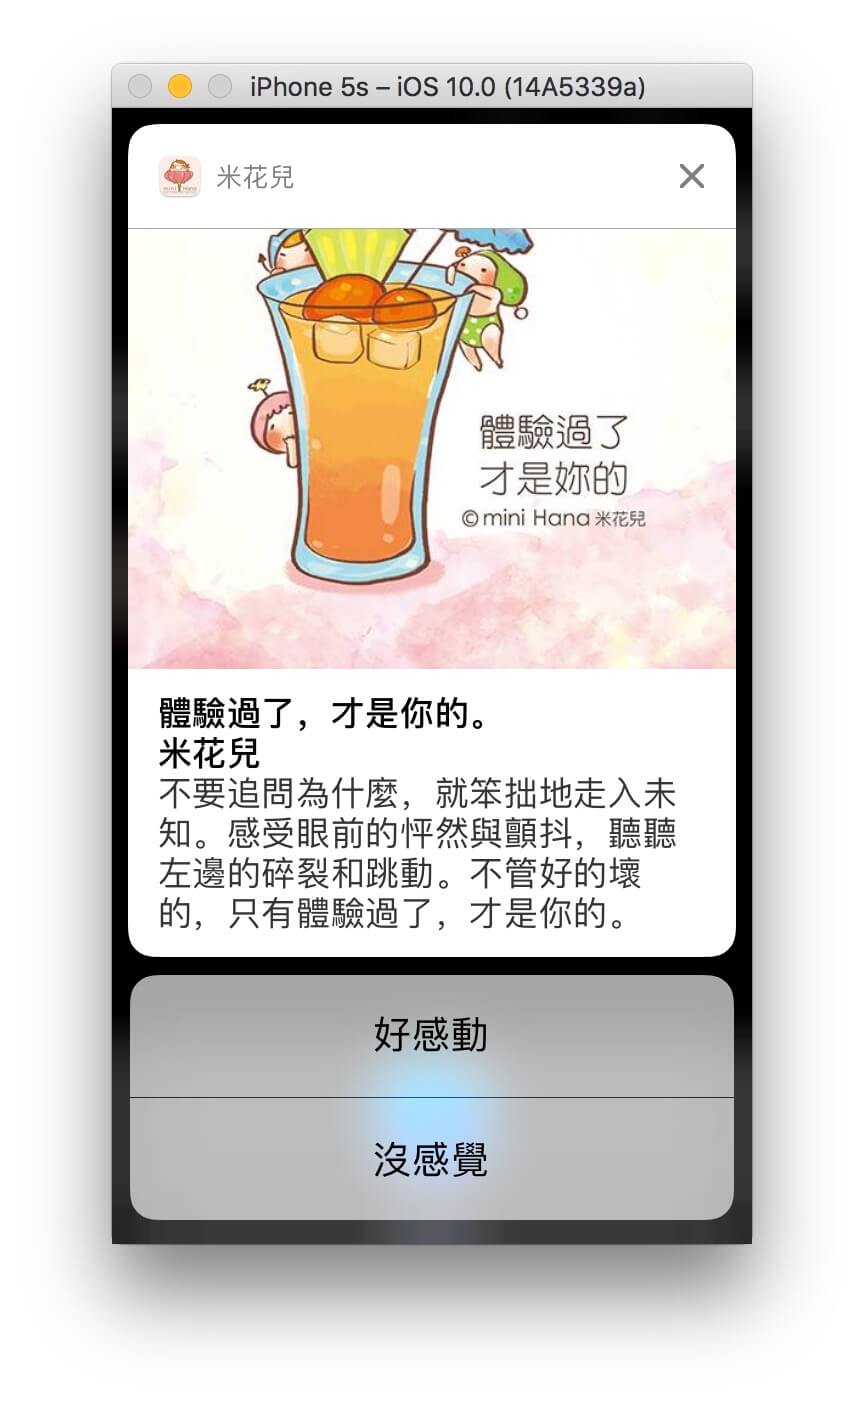
最後測試
執行米花兒 app ,傳送一個米花兒的幸福打氣通知。當收到米花兒的通知時,你會見到兩個客製化的按鈕。
通知的其它進階功能
關於通知,其實還有許多新奇有趣的功能,比方通知的讀取,刪除和更新,遠端推播 ( Push Notification ),利用 Notification Content Extension 設計通知拖曳展開後顯示的畫面,利用 Notification Service Extension 在收到通知時解密被加密的通知內容等,有興趣的讀者可參考 Apple 的官方文件以及以下兩個 WWDC16 的影片 :
關於通知或 iOS App 開發的相關技術,大家若有任何問題,可在這裡留言。也歡迎隨時聯絡彼得潘。當彼得潘回答大家的問題時,其實也在找答案的過程中精進學習,增長了自己的功力,和大家交了朋友,獲得再多錢也買不到的回報和收獲。
你可以在GitHub下載完整Xcode項目以作參考。