iOS 7 導入了自訂的視圖控制器過場,可以讓開發者在自己的 App 中建立視圖控制器畫面之間的動畫過場。在本文中,我們將會討論如何實現此功能。此外,我們也會展示如何建立手勢驅動過場,稱為互動式過場( Interactive Transition )。在開始之前,請先下載本文將會使用到的 Starter 專案。
開始動手吧
要建立自訂的過場效果,必須採取下列這 3 個步驟:
- 建立實作了
UIViewControllerAnimatedTransitioning協定的類別。在其中撰寫實現動畫的程式碼。此類別被稱為動畫控制器。 - 在呈現( Present )視圖控制器之前,必須先為此視圖控制器設定其過場委派。此委派將會取得步驟 1 的動畫控制器的回呼,以便在呈現視圖控制器時使用。
- 實作此回呼函式,以便傳回步驟 1 的動畫控制器實體。
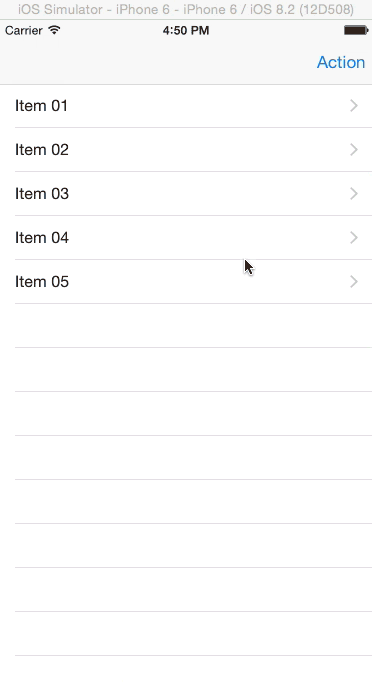
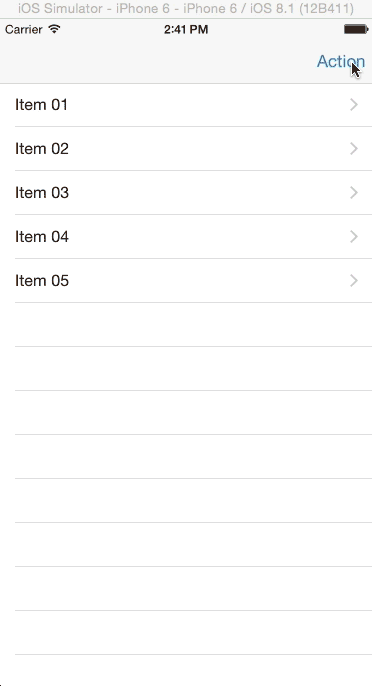
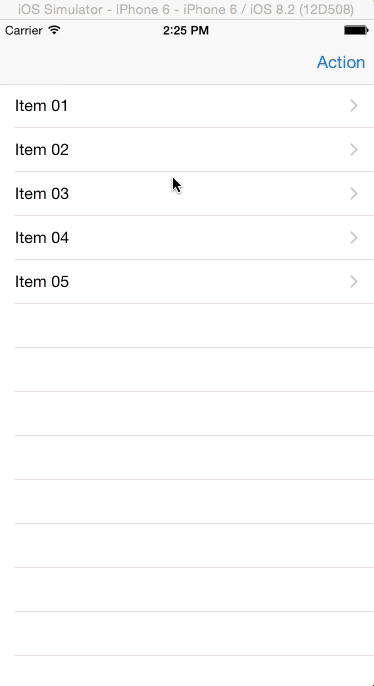
執行 Starter 專案,將會看到呈現了許多項目清單的表格視圖。導覽列上有一顆 Action 按鈕,當你點擊時,另一個視圖將會以常見的強制回應畫面( Modal )方式從下方浮現。我們將為此視圖撰寫自訂的過場效果。
自訂的呈現過場
如前所述,第一件事就是建立動畫控制器。首先建立名為 CustomPresentAnimationController 並且繼承自 NSObject 的新類別。將其宣告修改為如下所示。
class CustomPresentAnimationController: NSObject, UIViewControllerAnimatedTransitioning {
接著,我們必須為 UIViewControllerAnimatedTransitioning 協定加入 2 個必要的函式。在此類別中加入下列的函式。
func transitionDuration(transitionContext: UIViewControllerContextTransitioning) -> NSTimeInterval {
    return 2.5
}

func animateTransition(transitionContext: UIViewControllerContextTransitioning) {

    let fromViewController = transitionContext.viewControllerForKey(UITransitionContextFromViewControllerKey)!
    let toViewController = transitionContext.viewControllerForKey(UITransitionContextToViewControllerKey)!
    let finalFrameForVC = transitionContext.finalFrameForViewController(toViewController)
    let containerView = transitionContext.containerView()
    let bounds = UIScreen.mainScreen().bounds
    toViewController.view.frame = CGRectOffset(finalFrameForVC, 0, bounds.size.height)
    containerView.addSubview(toViewController.view)

    UIView.animateWithDuration(transitionDuration(transitionContext), delay: 0.0, usingSpringWithDamping: 0.5, initialSpringVelocity: 0.0, options: .CurveLinear, animations: {
        fromViewController.view.alpha = 0.5
        toViewController.view.frame = finalFrameForVC
        }, completion: {
            finished in
            transitionContext.completeTransition(true)
            fromViewController.view.alpha = 1.0
    })
}
第 1 個函式指定了過場動畫的持續時間長度。針對本文的範例 App ,我們設定為 2.5 秒鐘,不過在真實的 App 中,或許你應該設定為較短的時間。
在第 2 個函式中,使用 transitionContext 來取得導覽過程中的來源( From )視圖控制器與目的( To )視圖控制器,以及在動畫完成之後所應該呈現的最終畫面( Final Frame ),同時也充當存放相關來源和目的視圖控制器的容器視圖。
接著將 toView 的位置移動到螢幕底部的下方。並且將 toView 加入到容器視圖以及動畫閉包( Closure )中,我們透過設定其最終畫面為 transitionContext 所指定的位置,來實現 toView 的動畫效果。此外,我們也動態改變了 fromView 的透明度,以便隨著 toView 往螢幕上方滑過 fromView 時,讓 fromView 能夠展現淡出效果。整個動畫的持續時間是由 transitionDuration(transitionContext:) 設定。在完成閉包中,我們會在動畫完成時通知 transitionContext ,接著將 fromView 的透明度切換成一般的不透明。 iOS 框架隨後會從容器中移除 fromView 。
在製作完動畫控制器之後,我們需要將它連結到 Storyboard 的 Segue 。
開啟 ItemsTableViewController.swift 檔案,並將其類別宣告修改為如下所示。
class ItemsTableViewController: UITableViewController, UIViewControllerTransitioningDelegate {
UIViewController 擁有名為 transitionDelegate 的屬性,可以支援自訂的過場。在過場切換至視圖控制器時, iOS 框架會檢查這個屬性,以確認是否應該使用自訂的過場。自訂的過場是由 UIViewControllerTransitioningDelegate 負責提供。
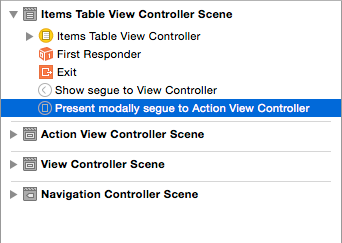
開啟 Main.storyboard 並且從 Attributes Inspector 中選擇 Present modally segue to Action View Controller ,設定其 Identifier 為 showAction 。
回到 ItemsTableViewController 並加入下列的類別。
let customPresentAnimationController = CustomPresentAnimationController()

override func prepareForSegue(segue: UIStoryboardSegue, sender: AnyObject?) {

    if segue.identifier == "showAction" {
        let toViewController = segue.destinationViewController as UIViewController
        toViewController.transitioningDelegate = self
    }
}
我們在此建立了動畫控制器的實體,接著在 prepareForSegue() 函式中偵測 Action 畫面的 Segue ,並且設定目的視圖控制器的 transitionDelegate 屬性。
在此類別中加入下列的 UIViewControllerTransitioningDelegate 函式。它將會傳回我們的動畫控制器的實體。
func animationControllerForPresentedController(presented: UIViewController, presentingController presenting: UIViewController, sourceController source: UIViewController) -> UIViewControllerAnimatedTransitioning? {
    return customPresentAnimationController
}
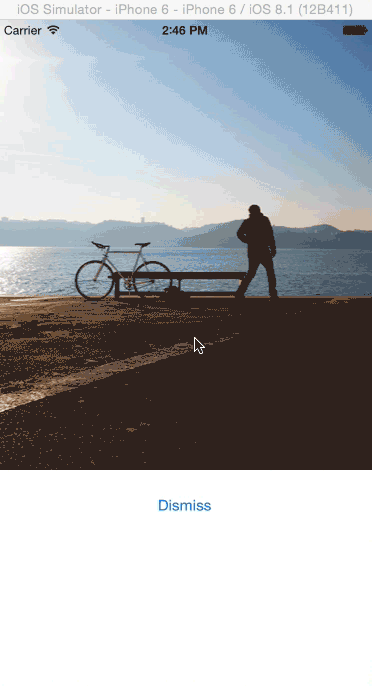
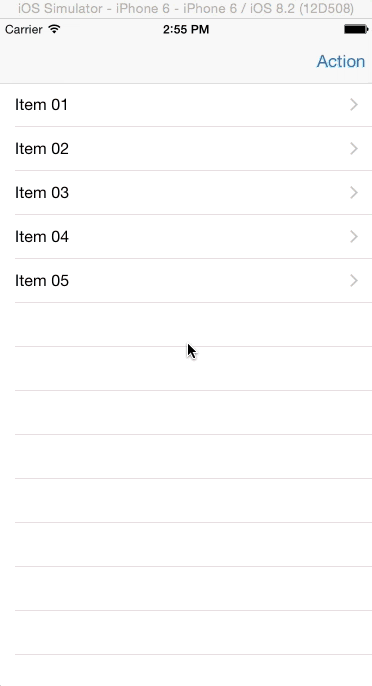
執行此 App ,你應該可以看見 Action 視圖緩慢地由下往上滑過螢幕,在靜止前還稍微彈跳了一下。
假使你希望採用稍微不一樣的效果,那麼可以將 CustomPresentAnimationController.swift 中的下列這行陳述式
toViewController.view.frame = CGRectOffset(finalFrameForVC, 0, bounds.size.height)
修改為如下所示,這會將目的視圖控制器的原始位置變更為位於螢幕頂端之上。
toViewController.view.frame = CGRectOffset(finalFrameForVC, 0, -bounds.size.height)
執行此 App ,這次 Action 視圖應該會從上方往下滑動。
自訂的消失過場
我們已經設定了自訂的過場並且用來呈現視圖,但是在視圖消失( Dismiss )時,卻依舊使用 Apple 所提供的預設過場。
UIViewControllerTransitioningDelegate 也可以讓你在視圖控制器消失(以及呈現)時,指定所要使用的動畫控制器。接著就讓我們來打造用於消失的過場動畫吧。
建立繼承自 NSObject 、名為 CustomDismissAnimationController 的類別。修改其宣告為如下所示。
class CustomDismissAnimationController: NSObject, UIViewControllerAnimatedTransitioning {
在此類別中加入下列的程式碼。
func transitionDuration(transitionContext: UIViewControllerContextTransitioning) -> NSTimeInterval {
    return 2
}

func animateTransition(transitionContext: UIViewControllerContextTransitioning) {
    let fromViewController = transitionContext.viewControllerForKey(UITransitionContextFromViewControllerKey)!
    let toViewController = transitionContext.viewControllerForKey(UITransitionContextToViewControllerKey)!
    let finalFrameForVC = transitionContext.finalFrameForViewController(toViewController)
    let containerView = transitionContext.containerView()
    toViewController.view.frame = finalFrameForVC
    toViewController.view.alpha = 0.5
    containerView.addSubview(toViewController.view)
    containerView.sendSubviewToBack(toViewController.view)

    UIView.animateWithDuration(transitionDuration(transitionContext), animations: {
        fromViewController.view.frame = CGRectInset(fromViewController.view.frame, fromViewController.view.frame.size.width / 2, fromViewController.view.frame.size.height / 2)
        toViewController.view.alpha = 1.0
    }, completion: {
        finished in
        transitionContext.completeTransition(true)
    })
}
這段程式碼非常類似於用來呈現過場的實作。在 animateTransition() 函式中,我們取得了目的及來源視圖控制器。此處的目的視圖控制器是表格視圖控制器。我們修改其視圖透明度的數值,使其在開始產生動畫時能夠有淡入的效果。隨後我們將此視圖新增到容器中,並將它置於來源視圖控制器的視圖背後,好讓它不被看見。
在動畫的程式碼區塊中,我們動態改變了 fromView 的尺寸,直到寬度及高度為 0 並且置中。這樣的效果會是 fromView 被縮小至完全看不見。此外我們也動態改變了 toView 的透明度,直到完全看得見為止。
在 ItemsTableViewController 中加入下列的屬性。
let customDismissAnimationController = CustomDismissAnimationController()
在此類別中加入下列的函式。
func animationControllerForDismissedController(dismissed: UIViewController) -> UIViewControllerAnimatedTransitioning? {
    return customDismissAnimationController
}
UIViewControllerTransitioningDelegate 協定提供了上述的函式,可以用來擷取消失視圖控制器的動畫控制器。
執行此 App ,你應該會看到如下的動畫。
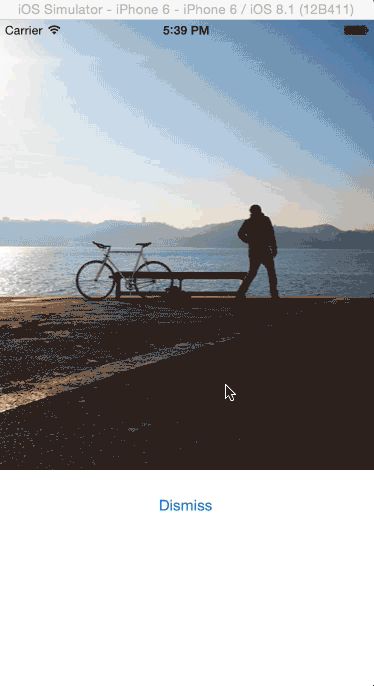
動畫效果並未如同我們的預期。來源視圖的白色畫面雖然如同預期般地縮小,但是該視圖上的圖片並未跟著改變其尺寸。這是因為改變視圖的畫面外框,並不會影響視圖中的子代元素。我們將透過 UIView 快照( Snapshotting )來修正這個部分。
UIView 快照的運作方式,是拍攝現有 UIView 的快照,並將之呈現為輕量化的 UIView 。接下來,我們將在動畫中使用這份快照,而不使用實際的視圖。
將 animateTransition() 函式以下列的程式碼取代。
func animateTransition(transitionContext: UIViewControllerContextTransitioning) {
    let fromViewController = transitionContext.viewControllerForKey(UITransitionContextFromViewControllerKey)!
    let toViewController = transitionContext.viewControllerForKey(UITransitionContextToViewControllerKey)!
    let finalFrameForVC = transitionContext.finalFrameForViewController(toViewController)
    let containerView = transitionContext.containerView()
    toViewController.view.frame = finalFrameForVC
    toViewController.view.alpha = 0.5
    containerView.addSubview(toViewController.view)
    containerView.sendSubviewToBack(toViewController.view)

    let snapshotView = fromViewController.view.snapshotViewAfterScreenUpdates(false)
    snapshotView.frame = fromViewController.view.frame
    containerView.addSubview(snapshotView)

    fromViewController.view.removeFromSuperview()

    UIView.animateWithDuration(transitionDuration(transitionContext), animations: {
        snapshotView.frame = CGRectInset(fromViewController.view.frame, fromViewController.view.frame.size.width / 2, fromViewController.view.frame.size.height / 2)
        toViewController.view.alpha = 1.0
    }, completion: {
        finished in
        snapshotView.removeFromSuperview()
        transitionContext.completeTransition(true)
    })
}
我們在此建立了來源視圖控制器的視圖快照、將之新增到容器中,並且從容器中移除了 fromView 。接著我們在動畫中縮小這份快照,在動畫結束時,再從容器中移除此快照。
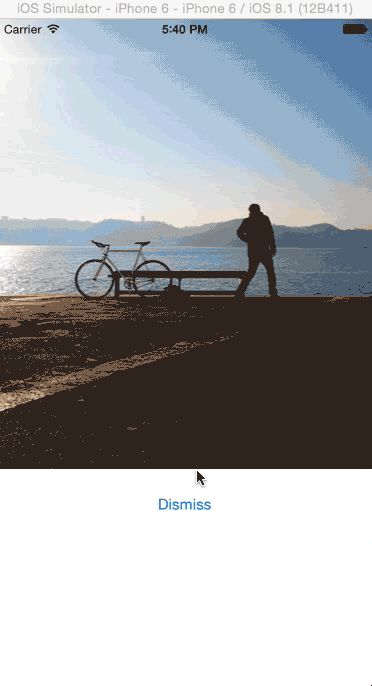
執行此 App ,這次動畫看起來應該會順暢許多。
導覽控制器的過場動畫
我們已經看過如何在呈現強制回應式的視圖控制器時加入自訂的過場動畫,當時是透過在呈現視圖控制器時加入過場委派。然而,在使用 UITabBarController 或 UINavigationController 時,要為每個視圖控制器都設定其委派實在太過累人了。
這些控制器提供了更為簡潔的作法,亦即透過 UITabBarControllerDelegate 或 UINavigationControllerDelegate 來供應過場效果所需的動畫控制器。
透過在導覽控制器中加入自訂的過場,我們將可以看到實際的效果。
讓我們從建立動畫控制器開始吧。首先建立繼承自 NSObject 、名為 CustomNavigationAnimationController 的類別,並將其宣告修改為如下所示。
class CustomNavigationAnimationController: NSObject, UIViewControllerAnimatedTransitioning {
將下列程式碼加入到此類別中。我們使用了立方體( Cube )動畫的簡化版本來作為動畫控制器。動畫控制器的設定方式就跟前面看過的 2 個範例一樣。請留意 reverse 這個類別變數。我們使用這個變數來決定動畫的方向,根據的是我們在主從視圖之間的移動方向。
var reverse: Bool = false

func transitionDuration(transitionContext: UIViewControllerContextTransitioning) -> NSTimeInterval {
    return 1.5
}

func animateTransition(transitionContext: UIViewControllerContextTransitioning) {
    let containerView = transitionContext.containerView()
    let toViewController = transitionContext.viewControllerForKey(UITransitionContextToViewControllerKey)!
    let fromViewController = transitionContext.viewControllerForKey(UITransitionContextFromViewControllerKey)!
    let toView = toViewController.view
    let fromView = fromViewController.view
    let direction: CGFloat = reverse ? -1 : 1
    let const: CGFloat = -0.005

    toView.layer.anchorPoint = CGPointMake(direction == 1 ? 0 : 1, 0.5)
    fromView.layer.anchorPoint = CGPointMake(direction == 1 ? 1 : 0, 0.5)

    var viewFromTransform: CATransform3D = CATransform3DMakeRotation(direction * CGFloat(M_PI_2), 0.0, 1.0, 0.0)
    var viewToTransform: CATransform3D = CATransform3DMakeRotation(-direction * CGFloat(M_PI_2), 0.0, 1.0, 0.0)
    viewFromTransform.m34 = const
    viewToTransform.m34 = const

    containerView.transform = CGAffineTransformMakeTranslation(direction * containerView.frame.size.width / 2.0, 0)
    toView.layer.transform = viewToTransform
    containerView.addSubview(toView)

    UIView.animateWithDuration(transitionDuration(transitionContext), animations: {
        containerView.transform = CGAffineTransformMakeTranslation(-direction * containerView.frame.size.width / 2.0, 0)
        fromView.layer.transform = viewFromTransform
        toView.layer.transform = CATransform3DIdentity
    }, completion: {
        finished in
        containerView.transform = CGAffineTransformIdentity
        fromView.layer.transform = CATransform3DIdentity
        toView.layer.transform = CATransform3DIdentity
        fromView.layer.anchorPoint = CGPointMake(0.5, 0.5)
        toView.layer.anchorPoint = CGPointMake(0.5, 0.5)

        if (transitionContext.transitionWasCancelled()) {
            toView.removeFromSuperview()
        } else {
            fromView.removeFromSuperview()
        }
        transitionContext.completeTransition(!transitionContext.transitionWasCancelled())
    })
}
開啟 ItemsTableViewController.swift 並修改其類別宣告為如下所示。
class ItemsTableViewController: UITableViewController, UIViewControllerTransitioningDelegate, UINavigationControllerDelegate {
UINavigationControllerDelegate 提供了動畫控制器。
在此類別中加入下列的屬性。
let customNavigationAnimationController = CustomNavigationAnimationController()
在 viewDidLoad() 的結尾處加入下列程式碼。
navigationController?.delegate = self
上述的程式碼設定了主導覽控制器的委派,以便接收新的過場委派函式。
接著,在此類別中新增下列的程式碼。
func navigationController(navigationController: UINavigationController, animationControllerForOperation operation: UINavigationControllerOperation, fromViewController fromVC: UIViewController, toViewController toVC: UIViewController) -> UIViewControllerAnimatedTransitioning? {
    customNavigationAnimationController.reverse = operation == .Pop
    return customNavigationAnimationController
}
上述的函式會在要求動畫控制器時被呼叫到,以便在來源與目的視圖控制器之間導覽,此函式會傳回動畫控制器的實體。過場方向會因為 Push 或 Pop 導覽操作而有所不同。
執行此 App 。選取表格視圖中的任何一個儲存格,應該可以看到如下所示的動畫。
添加互動性
讓我們試著替上述的過場動畫添加更多互動性吧,換句話說,使用者將能夠透過手勢來控制過場。
iOS 內建的 App 都具備了這項特色。你可以透過從螢幕左側往右撥動的方式來啟動過場,並以此作為返回鈕的替代選擇。你可以利用幅度較短的撥動來概略檢視主視圖,然後放開手指頭以取消過場。而幅度較長的撥動則可以啟動 Pop 導覽操作。
讓我們從互動控制器開始吧。互動控制器使用了 UIViewControllerInteractiveTransitioning 協定。導覽控制器委派或過場委派在要求完動畫控制器之後,可能會接著要求一個選用的互動控制器。
現在就來建立互動控制器吧。建立繼承自 UIPercentDrivenInteractiveTransition 、名為 CustomInteractionController 的新類別。
UIPercentDrivenInteractiveTransition 實作了 UIViewControllerInteractiveTransitioning 協定,所以我們無須將之加入到我們的類別當中。
若要使用 UIPercentDrivenInteractiveTransition ,你的動畫控制器必須使用單一的 UIView 動畫,好讓動畫能夠被停止、反轉,以及播放。
在此類別中加入下列的程式碼。
var navigationController: UINavigationController!
var shouldCompleteTransition = false
var transitionInProgress = false
var completionSeed: CGFloat {
    return 1 - percentComplete
}

func attachToViewController(viewController: UIViewController) {
    navigationController = viewController.navigationController
    setupGestureRecognizer(viewController.view)
}

private func setupGestureRecognizer(view: UIView) {
        view.addGestureRecognizer(UIPanGestureRecognizer(target: self, action: "handlePanGesture:"))
}

func handlePanGesture(gestureRecognizer: UIPanGestureRecognizer) {
    let viewTranslation = gestureRecognizer.translationInView(gestureRecognizer.view!.superview!)
    switch gestureRecognizer.state {
    case .Began:
        transitionInProgress = true
        navigationController.popViewControllerAnimated(true)
    case .Changed:
        var const = CGFloat(fminf(fmaxf(Float(viewTranslation.x / 200.0), 0.0), 1.0))
        shouldCompleteTransition = const > 0.5
        updateInteractiveTransition(const)
    case .Cancelled, .Ended:
        transitionInProgress = false
        if !shouldCompleteTransition || gestureRecognizer.state == .Cancelled {
            cancelInteractiveTransition()
        } else {
            finishInteractiveTransition()
        }
    default:
        println("Swift switch must be exhaustive, thus the default")
    }
}
傳入 attachToViewController() 函式的是導覽控制器的參照,以便在手勢發生時用來啟動 Pop 過場。我們接著設定了手勢辨識器( Gesture Recognizer ),並在撥動行為發生時呼叫 handlePanGesture() 函式。此函式會檢查手勢辨識器的狀態,並且在各階段進行下列任務:
- Began(開始):將
transitionInProgress設定為 true ,並啟動 Pop 導覽。 - Changed(改變):此時手勢正在進行中,因此提供的是過場的百分比。幅度為 200 個點的撥動將會造成完成度為 100% 的過場。接著,根據手勢在何處結束來決定過場是否也應該結束。我們在此檢查使用者在放開手指頭之前,是否至少撥動達半個螢幕的寬度。
- Cancelled/Ended(取消/結束):將
transitionInProgress設定為 false ,如果shouldCompleteTransition被設定為 false 或者手勢已經取消,則取消過場。否則的話,便讓過場完成。
我們使用運算過的屬性來決定過場的完成速度。 completionSeed 是 UIPercentDrivenInteractiveTransition 的屬性,通知 iOS 框架在完成手勢時,還剩餘多少動畫。數字越大,代表視圖控制器在互動取消時的彈回速度越快。
若要使用我們的互動控制器,開啟 ItemsTableViewController.swift 並將下列的程式碼加入到此類別中。
let customInteractionController = CustomInteractionController()
將下列的程式碼加入到 navigationController(_:animationControllerForOperation: 函式的開頭處。
fromViewController:toViewController:)
if operation == .Push {
    customInteractionController.attachToViewController(toVC)
}
這段程式碼會呼叫 CustomInteractionController 的 attachToViewController() 函式,並且在偵測到屬於 Push 導覽操作時,傳入目的視圖控制器的參照。
接著在此類別中加入下列程式碼。
func navigationController(navigationController: UINavigationController, interactionControllerForAnimationController animationController: UIViewControllerAnimatedTransitioning) -> UIViewControllerInteractiveTransitioning? {
    return customInteractionController.transitionInProgress ? customInteractionController : nil
}
在 iOS 框架要求並取得動畫控制器之後,接著會利用上述的函式來要求互動控制器。如果過場仍在進行中的話,上述的函式將會傳回互動控制器的實體。
執行此 App ,你應該可以看到如下所示的過場動畫。
結語
在本文中,我們介紹了如何建立自訂的視圖控制器過場效果,以及如何提昇過場的互動性。透過這些功能,開發者將可以在他們自己的 App 中,徹底控制視圖控制器之間的過場動畫,進而營造獨一無二的體驗,並且取悅使用者。你可以從這裡下載本文的完整專案。
原文:Introduction to Custom View Controller Transitions and Animations